Edit User
The Edit User screen allows you to edit the existing user details. Refer to New User.
Note: Only an Application Administrator can edit or delete another application administrator. The user who is NOT an application administrator but has Editing permission can only edit or delete another non-application administrator.
Editing an Existing User
- Select Manage > Users.
- The View Users screen will appear.

- Click on the First Name of the user you want to edit. The First Name is a Link in the View Users screen, which will navigate to the View/ Edit User screen.

- You can make the required changes on this screen.
Note on Editing Email:
- If you are using a Single Sign On (SSO) User, please be aware that you cannot change the user email here. Changing the email here so that it no longer matches the email in FSAD means this user can no longer log in to Inventory Cloud. If you want to change a user's email while using SSO, change it first in the active directory, then send a new invitation to the user. The user must accept the new invitation and re-register.
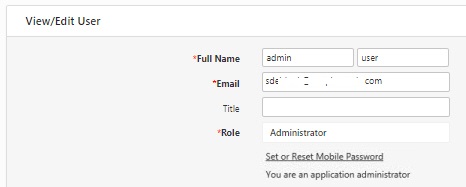
- The Reset Password link appears as Set or Reset Mobile Password for SSO users, as shown above. You will use this link to initially create a password for logging in to mobile devices. Also, use this link to reset the password for logging into mobile devices.
- If your organization is not using SSO, the link will be Reset Password. This link resets the password for logging into the application.

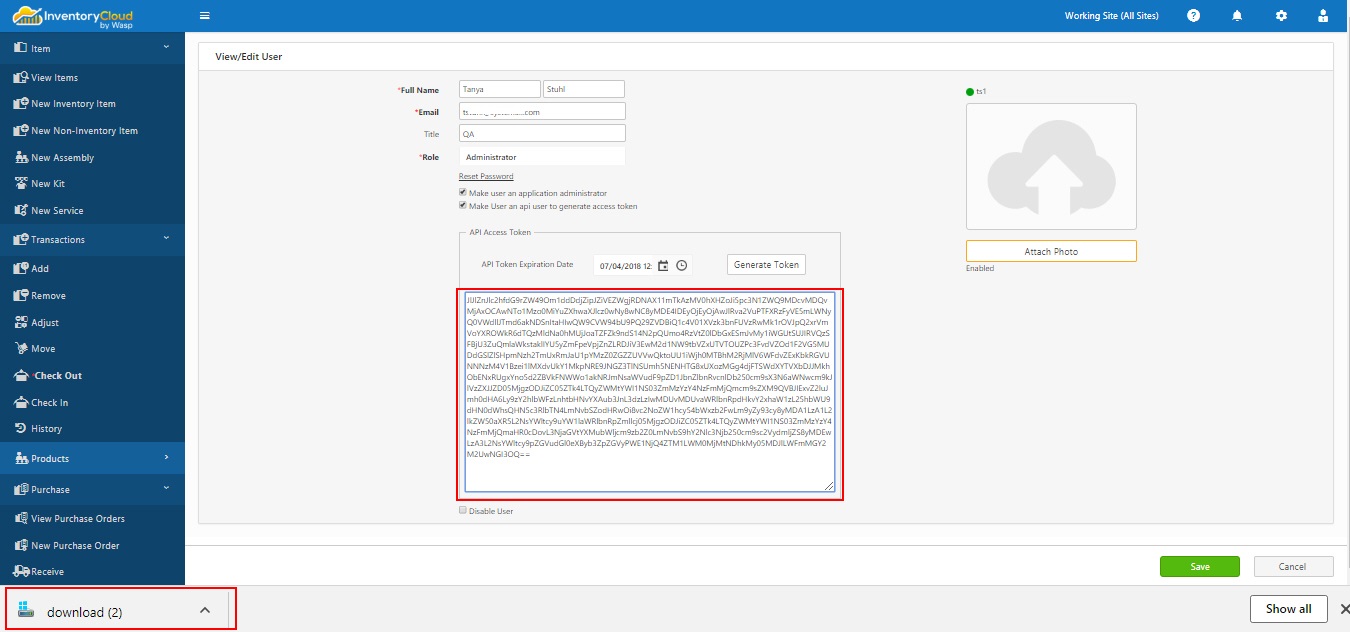
- API Access Token: API Access Token allows you to generate public API tokens. This feature is enabled only if you have a Complete Edition of the application.
Notes:
- The user should have accepted the invitation.
- Calls made using a Public API Token will be subjected to the same security restrictions as the user for which the token is created. A user can not create a token for a user with more rights than he currently has. So for full access to all Public API functions without any permission restrictions, we still recommend creating the Token from an administrator account with App Admin privileges.
- Warning: Changing the user's role after the token has been generated may have adverse effects on the API calls being made. We recommend leaving such API user accounts in some administrator role.
- Note for On-Premise Users: It is not possible to create a public API token for the built-in admin user. This particular “admin” user account is related to the On-Premise application only. For security reasons, Public API tokens may only be generated using different user accounts.
- Select the "Make User an API user to generate access token" checkbox.
- Select the API Token Expiration Date using the calendar. Time can also be selected using the clock.
- Click on the Generate Token button.
- A message will appear in case you already have a valid token. It will display the token's last issued date and ask -"if l you still want to generate the token." If yes, click on the Generate Token button.
Note: Generating a new token for a particular user permanently disables all prior tokens generated for this user. Also, If the user account is disabled, the token will get disabled, and the API calls will fail.

-
On clicking the Generate Token button, the API Access Token field automatically captures the token details. You do not have to enter the token manually. Also, the token gets downloaded.
Notes:
- You must save the downloaded token because you cannot retrieve them anywhere in the application.
- The token will be lost if you leave the Edit User screen.
- You can always generate a new token if you forget to save the token.
- If you feel that your access token has been compromised in any way, you can generate a new token that will invalidate the previous token.

- Disable User checkbox is used to disable a user or to restrict a user for some time. Click on the checkbox to disable the user.
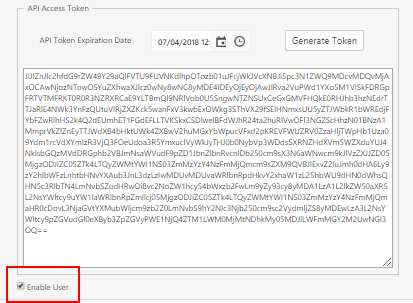
- Enable User checkbox will appear if the user is disabled. Click on the checkbox to enable the user.
