Pick
The pick screen allows you to enter the number (i.e., quantity) of items removed from the inventory. The "Quantity" is entered in the Pick Item section.
The quantities are checked, and you cannot pick more than you actually have in inventory unless the Allow Over Pick option is enabled in the Settings screen. When a pick order is picked, this indicates that the inventory is ready to be shipped to the customer. Similarly, If the Auto Close Pick setting is turned On, the pick will be closed automatically when all requested inventory has been received completely. Refer to Settings > Ordering to view Pick related settings.
The pick Inventory option is available on iOS and Android devices.
Pick Orders and Container Selection - Note: The container feature is scheduled for a future release.
Pick Order
- Select Pick Order > Pick.
- The Pick screen will appear.
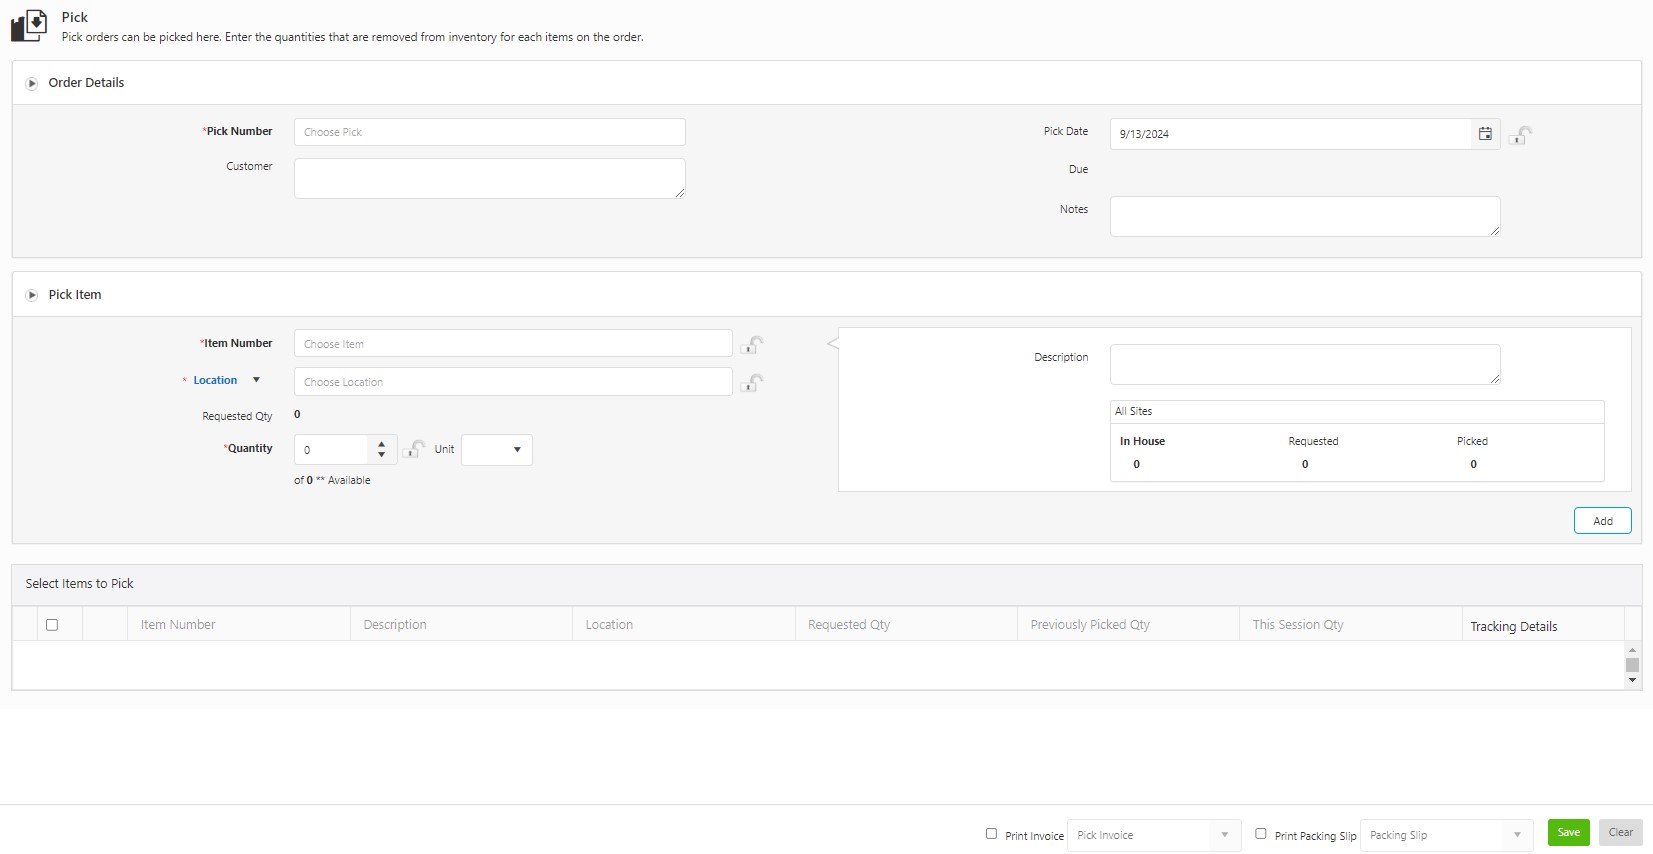
Note: Several fields in this section can be "locked". When a field is locked, it will retain the information you entered through subsequent transactions. This is useful if you are adding multiple items to a location or checking out multiple Items to a single customer. To lock an individual field, click on the lock icon. You can select the Lock All button to quickly lock all fields that have the icon. Select Unlock All to unlock the fields, allowing you to add new information.
Click here for information on how to Lock fields.
Order Details section
Note: The site name will be displayed next to the order details if the order is assigned to a site.
- Choose the Pick Number.
- With Site Restrictions Enabled (Manage > Roles > Site Restrictions), the user will only see the Global Pick orders not assigned to any site and the Local Pick Orders assigned to a site to which the user has access.
- With Working Sites Enabled, the user will see the Pick Items available in the allowed sites. Also, they can find other pick items by typing the exact pick item number/name. The number/name should be the exact match and must fall within the site permissions.
- The Customer Details get automatically populated on choosing the Pick Number.
- By default, the Pick Date field will display the current date. The date can be changed.
- The Due Date field is read-only. The date will be displayed if it is set when creating a pick order.
- Enter the notes, if required.

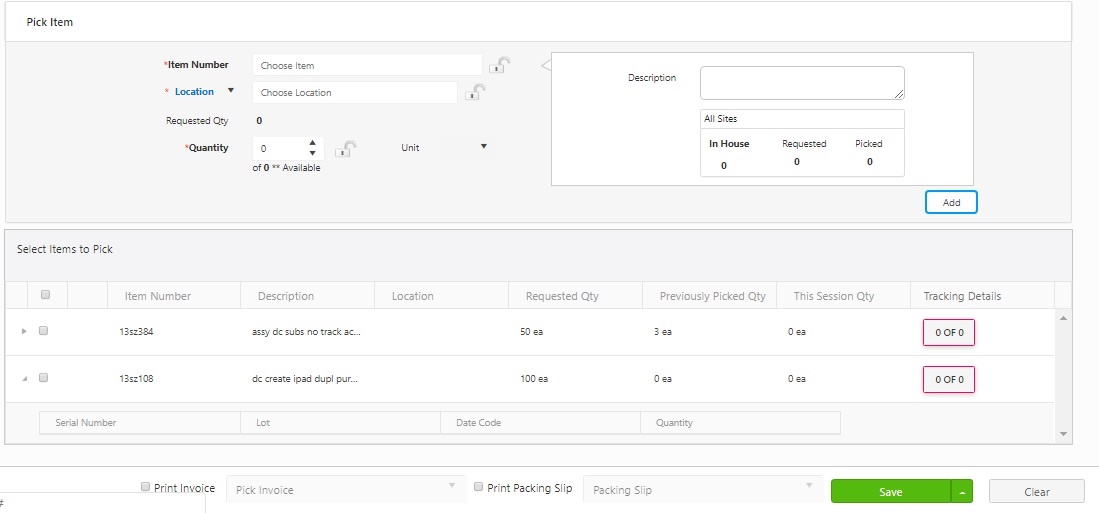
Select Items to Pick section
- When a pick number is selected, the items associated with that pick order will appear in the "Select Items to Pick" section, where their details can be edited or updated.
Updating the item details
- You can update the item details. Following are the ways to update the details.
- Choose an item from the "Select Items to Pick" queue to populate its details in the Pick Item section.
- Updating Item Details: Enter or select the item number in the Item Number field (location and description will auto-populate). Add the quantity and tracking details. Click the Add button to save changes (tracking details can also be updated in the "Select Items to Pick" section).
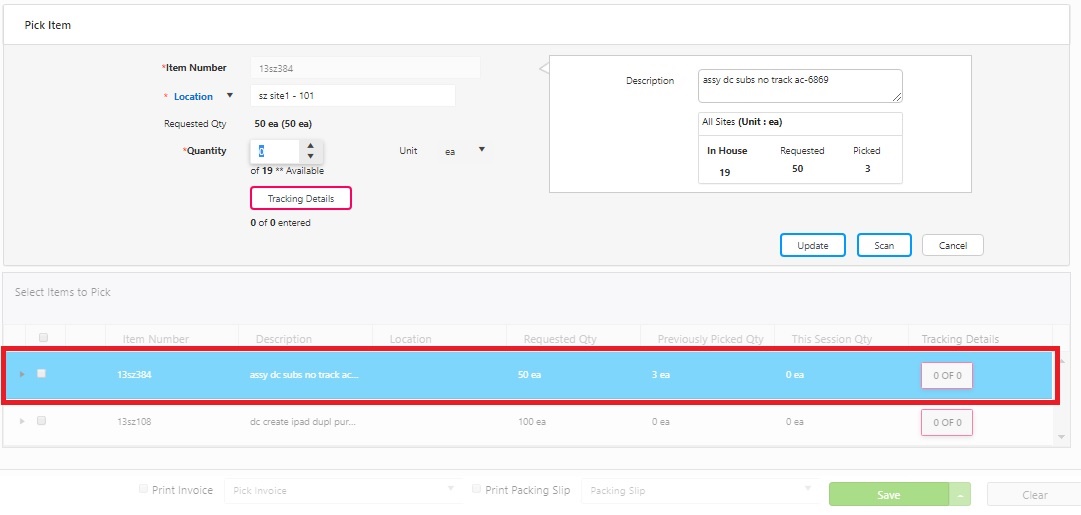
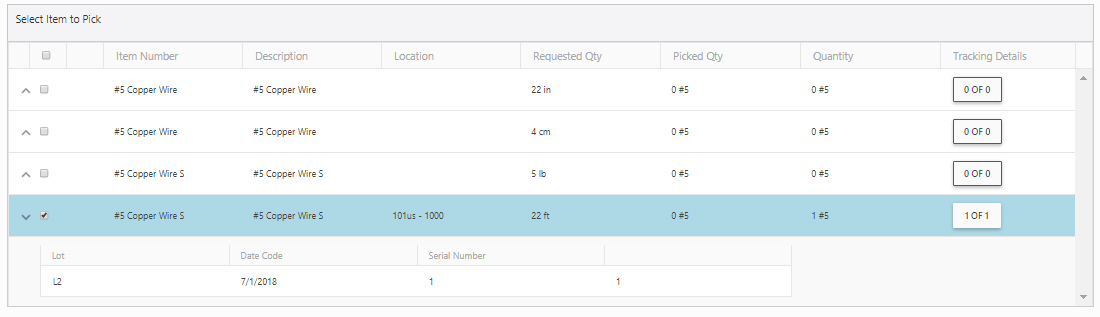
- Items with tracking details: Select the item from the queue to populate its information in the Pick Item section. Add the quantity and tracking details. Click the Update button, with options to use the Scan or Cancel buttons as needed.
- Using Scan and Edit: In the item details section, switch between Scan and Edit modes as needed. Clicking the Scan button makes all fields except the Scan Here field read-only. Scanning an item number adds tracking details to the grid, increasing the quantity with each scan.
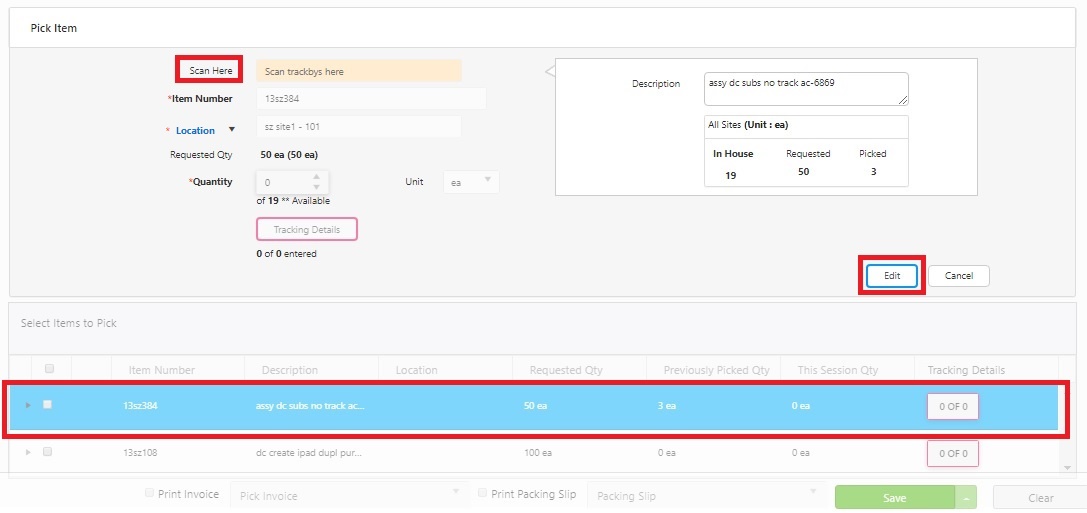
To modify fields other than the Scan Here field, click the Edit button to enable location, quantity, and tracking details. Make the changes and click the Update button.
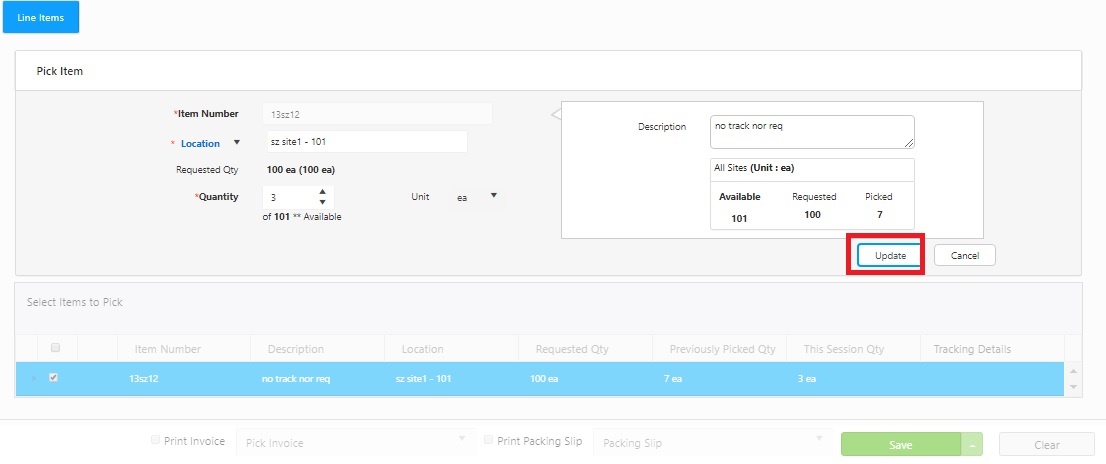
- Items without tracking details: The Pick Item section will only display the Update and Cancel buttons. Update the tracking details and quantity, then click the Update button.
- Picking a Kit - The sub-menus will appear for KIT and display the Bill of Material. Make sure that you always select an equal quantity of each item. The application will throw an error if you pick an uneven quantity of items.
- Site-Item/category restrictions - While picking the order, if the item to be picked (in the queue) falls in the Site-Item/category restrictions, then a warning message will appear indicating that "Transaction disallowed due to existing site/category restrictions.” and the location field will be restricted, i.e., it will not display or allow to select the location.

- Picking the item from a location or container - Use the dropdown to select a location or container. You can pick an item from a container or a location.
Note: The container feature is scheduled for a future release.
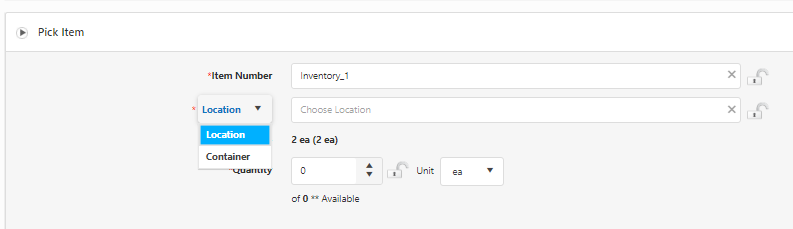
- The location/container field is an autocomplete dropdown for selecting either locations or containers. If "Container" is selected and no containers match the search (with a non-empty query), the dropdown automatically switches to search for locations. The same logic applies when "Location" is selected. The field name updates dynamically between "containers" and "locations" based on the search results.
- When a location is selected, the site and location information are displayed. If a container is selected, the site-location-container ID is shown.
- The location field will display the site and location name when hovered over with the mouse. Likewise, hovering over a selected container will show the site, location, container type, and container ID.
- Select or enter the quantity.
- Click on the Add button.
- When you are done editing/updating the details of the items, click on the Print Invoice checkbox at the bottom of the screen to print the Invoice. You can print the packing slip by checking the Print Packing Slip checkbox. This step is optional.

- The Pick screen allows you to Save, Save and Close or Close and Create Backorder.
- Save indicates that the Item is picked. Note: Save can be initiated at any time during the Pick process.
- Save and Close indicates that the Item is picked and the request is closed.
- Close and Create Backorder - The pick order will get closed, and a backorder will be created. Note that only the pick order with a quantity less than ordered can be closed.

Pick Orders and Container Selection
Note: The container feature is scheduled for a future release.
The Pick screen has a feature that allows you to pick the entire container by specifying the container ID where the item is stored and also allows you to partially pick the items stored across multiple containers.
- Select a pick order to display available items in the queue.
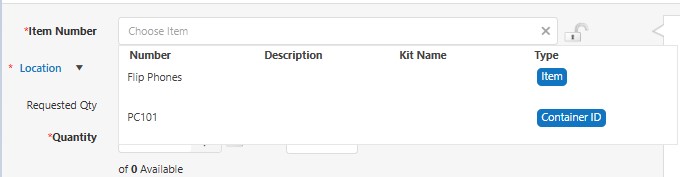
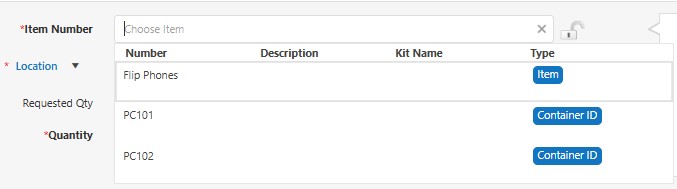
- Open the dropdown menu to view items along with their container IDs. Note that the dropdown will only display the requested item and the containers that contain the selected item.
- When the Item is in a Single Container
- When the Item is in a Multiple Container
- Moving an Entire Container to the Pick Queue: Select the container instead of a specific item inside it to move the entire container to the "Select Items to Pick" queue.
- The "Select Items to Queue" screen will display the container name at the top level. Expanding the line item will reveal the items inside the container along with their requested quantities.

- Moving an Item in a Container to the Pick Queue & Enabling Partial Picking from Containers: Select the container ID in the Location/Container field.
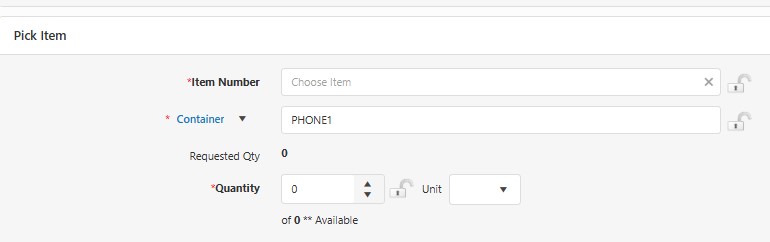
In the item number field, you can choose a specific item. This action allows you to select a container where the item resides and update the quantity before moving it to the "Select Items to Pick" queue. You can also partially pick from multiple containers to fulfill the total quantity required for an item.
As described above, the dropdown will only display containers that hold the selected item. For items stored in multiple containers, follow these steps:
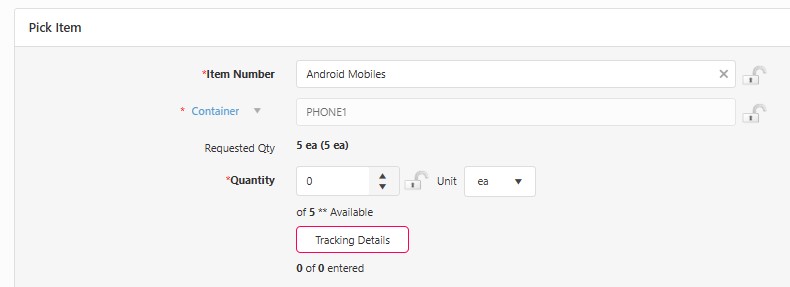
- Select the item and the container, specify the required quantity, and add it to the queue.
- Repeat the process by selecting the same item, choosing another container, specifying the quantity, and adding it to the queue again.
- To update the container or quantity information, from the "Select Items to Pick" queue, choose an item to populate its details in the Pick Item section.
- Edit the information as needed and click Update.

- When the Container has extra Inventory: If the selected container includes items not listed in the pick order, a notification will prompt you to pick the required items before adding the container to the queue. Use the Remove Inventory feature to remove the extra items or the Move Transaction feature to transfer them to another container.
- In this case, the container ID will be removed from the item number field and will instead appear in the Location/Container field.
- In the item number field, you can choose a specific item. This action allows you to select the required item from the container and update the quantity before moving it to the "Select Items to Pick" queue.

- Over-Picking from a Container: When attempting to over-pick from a container, If the pick order for an item specifies a quantity of X, and you select a container with inventory exceeding the requested quantity, the following message will appear: "This container has inventory that is not on the order, and the quantity is greater than the requested quantity. Do you want to over pick the entire container and all of its contents?".
- Choose "Yes" to proceed. This action moves the entire container and its contents to the "Select Items to Pick" queue. (Refer to point 3)
- Choose "No" to cancel the over-pick. In this case, the container ID will be removed from the item number field and will appear in the Location/Container field instead. (Refer to point 4)

- Save and close the pick order to mark the item as picked and close the request.
FAQs - Refer to Knowledgebase - Knowledgebase > Cloud for FAQs. Example: How to fix a Pick Order picked by mistake?
Note: Use of the resources described here requires internet access.