Android Remove
The Remove Inventory screen allows you to remove quantity from any item in your inventory. You can designate which customer this inventory was associated with on this screen.
Tap on Transactions > Remove.
![]()
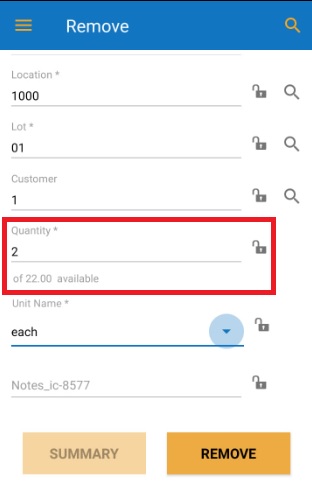
The Remove screen will appear.
![]()
Note:
- Fields with an asterisk (*) are mandatory. Also, you can lock the field, refer to Android Pinning Data. The magnifying glass icon allows you to search for an item. It will navigate to the Search Items screen where you can search for items.
- You can use the keyboard to enter the information in any field. Or if you want to scan a barcode, use the barcode scanner. Tap on the Barcode symbol, the scanner will appear. Scan the barcode and the field will display the scanned barcode number.

Removing an Inventory
- Enter the item number or search for it. For more details, see the topic "search items on the view items screen".
- The item description will automatically populate based on the details provided during item creation. This field will be read-only. In some cases, the site and location may also autofill.
- Enter or select the site. For more information, refer to the search site topics.
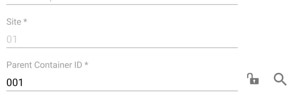
- Enter or select the location or container. For details, refer to "search locations".
- On selecting a container, the location field will get updated to Parent Container ID. Note: The container feature is scheduled for a future release.
- Provide the track-by details.
Note: If items are tracked using track-by options, such as serial number, lot number, or date, the respective fields will appear. If the item is tracked by serial number, the quantity will always be 1, as each item will have a unique serial number.
- Enter or select the customer/vendor. For more information, refer to the search customer/search vendor topic.
- Enter the quantity. The available quantity will be displayed.
- The quantity field will be read-only and will be one if the item is tracked by a serial number.
- Select the unit name.
![]()
- Add any relevant notes.
- Tap on the Remove button.
- The Summary button will display a number representing the total transactions added. If the "Show Summary Screen on Remove" option is enabled in Mobile settings, the summary screen will appear.
![]()
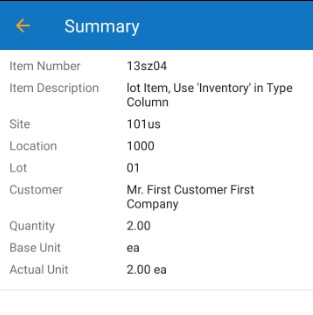
- Tap the Summary button to view the summary screen, which lists all added transactions.
To Remove a Kit
- Enter/scan the kit item. You can also search for a kit item. For more details, see the topic "search items on the view items screen".
![]()
- The item description will automatically populate based on the details provided during item creation. This field will be read-only. In some cases, the site and location may also autofill.
- Enter or select the site. For more information, refer to the search site topics.
- Enter or select the location or container. For details, refer to "search locations".
- On selecting a container, the location field will get updated to Parent Container ID.
- Provide the track-by details.
Note: If items are tracked using track-by options, such as serial number, lot number, or date, the respective fields will appear. If the item is tracked by serial number, the quantity will always be 1, as each item will have a unique serial number.
- Enter or select the customer. For more information, refer to the search customer topic.
- Enter the quantity. The available quantity will be displayed.
- Select the unit name.
- Add any relevant notes.
- Tap on the Remove button.
- The screen will navigate to the Sub-Items screen, where the "Bill of Material in the Kit" is displayed. Fill in all the required details as mentioned earlier.
- Similarly, update all the sub-items on the Sub-Items screen.
![]()
- After updating all the sub-items, tap the Remove button.