Configure SAML IdP using Google App
Configuring Google App as a SAML 2.0 Provider - Using SAML-based SSO, Single sign-on (SSO) lets users sign in to all their enterprise (complete edition) cloud applications using their managed Google account credentials. You can use both Identity Provider (IdP) initiated SSO, and Service Provider (SP) initiated SSO.
Configure SAML IdP using Google App
Settings Import and Validation
Configure SAML IdP using Google App
Set up your own custom SAML application
- Sign in to your admin.google.com. Sign in using your administrator account. Note: Do not use an account ending with @gmail.com example - bricker.dl.net@gmail.com.
Note: The email returned by GoogleApp must match the email of the person configuring the SAML Single Sign-on during validation. The email returned by GoogleApp must match the email of every user during registration and login as well. The email is used to find the Wasp user account during the SAML login. If for any reason, like Active Directory synchronization, the email returned by GoogleApp for a user changes that user's email in Wasp must also be changed to match or the user will need to accept a new invitation and registration.
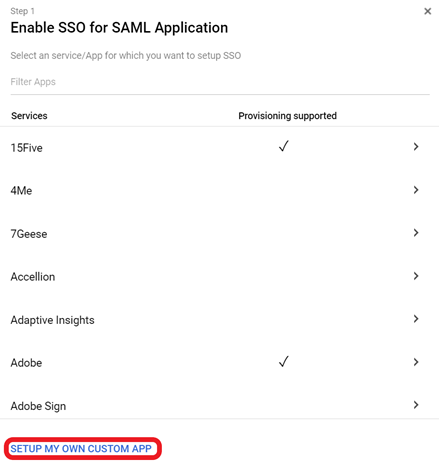
- From the Admin Console home page, go to Apps > SAML apps.
- Click on Add (the plus icon).
- Click Set up my own custom app.
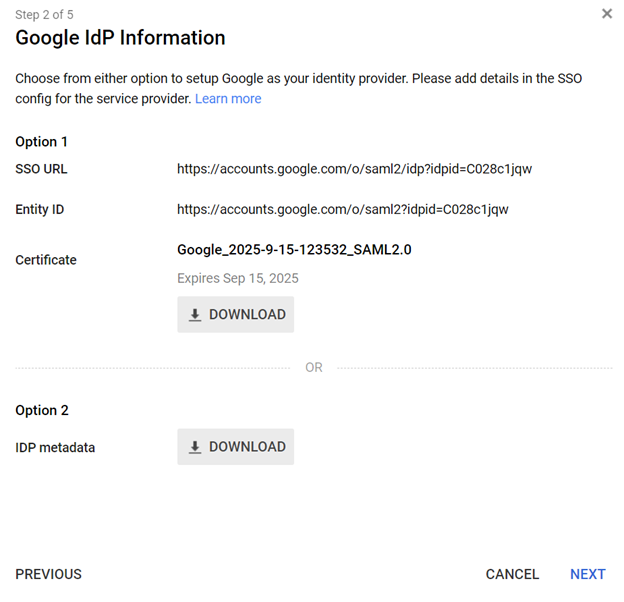
- The Google IDP Information window opens and the SSO URL and Entity ID fields automatically populate.
- Get the setup information needed by the service provider using one of these methods:
- Method 1 - Choose Option 2 - Download the IDP metadata and save it to upload into the Wasp settings later.
- Method 2 - Copy the SSO URL and Entity ID and download the certificate.
- Click Next.
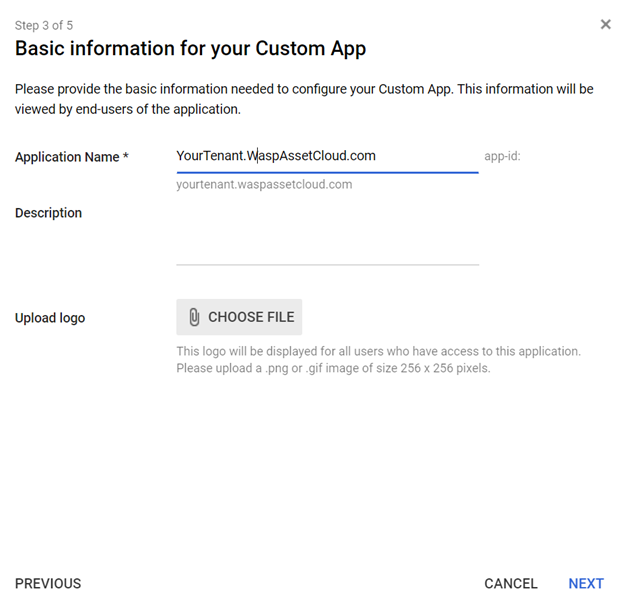
- In the basic information window, add an application name and description.
- Upload a PNG or GIF file to serve as an icon for your custom app. The icon image should be 256 pixels square. (Optional)
- Click Next.
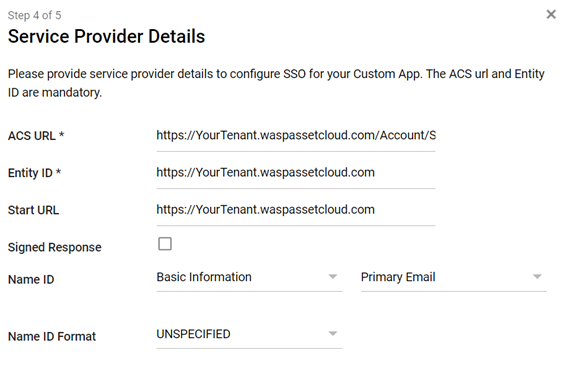
- In the Service Provider Details window, enter the SSO URL value you copied from the Settings screen into the ACS URL. Note: The ACS URL should start with https://
- The SSO Service URL will be : https://yourtenant.waspinventorycloud.com/Account/SAML
- Paste the Entity ID you copied from the settings screen into the Entity ID and Start URL field. Verify that they are the same as the ACS URL except with the /Account/SAML route suffix, it would be https://yourtenant.waspinventorycloud.com
- The default name ID is the primary email. Multi-value input is not supported. These defaults are fine.
Tip: Check the setup articles in our SAML app catalog for any Name ID mappings required for apps in the catalog. If you need to use Groups for added security, you can add Group as a custom attribute, either in the Admin Console or via Google Admin SDK APIs, and map to those. Custom attributes need to be created prior to setting up your SAML app.
- Click Next.
- (Optional) Click Add new mapping and enter a new name for the attribute you want to map. In the drop-down list, select the category and user attributes to map the attribute from the Google profile.
Note: You cannot use employee ID or employee type for attribute mapping.
Group could be used, for example, for added security. If you want to map "Group" for this additional security feature, map the group to the SAML standard field memberOf:

- Click Finish.
Turn on your SAML app
- Sign in to your Google Admin console. Note: Sign in using an administrator account, not your current account.
- From the Admin Console home page, go to Apps > SAML apps.
- Select your SAML app.
- Click User Access.

- To turn on or off service for everyone in your organization, click On for everyone or Off for everyone. Click Save.
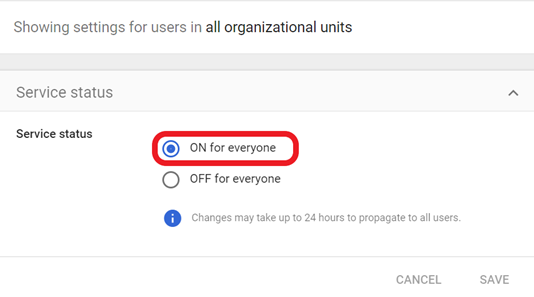
- To turn on or off service only for users in an organizational unit:
- On the left, select the organizational unit.
- Select On or Off.
- To keep the service turned on or off even when the service is turned on or off for the parent organizational unit, click Override.
- If the organization's status is already overridden, choose a following option:
- Inherit - Reverts to the same setting as its parent.
- Save - Saves your new setting (even if the parent setting changes).
Learn more about organizational structure.
- To turn on a service for a set of users across or within organizational units, select an access group. For details, go to turn on a service for a group.
- Ensure that the email addresses your users used to sign in to the SAML app must match the email addresses they used to sign in to your Google domain.
Changes typically take effect in minutes but can take up to 24 hours. For details, see How changes propagate to Google services.
FAQs - Refer to Knowledgebase - Knowledgebase > FAQs.
- Wasp Cloud products: SSO setup with ADFS: Required fields, XML file, and other info
- Wasp Cloud products: SSO setup with Azure AD SAML: Required fields, XML file, and other info
- Wasp Cloud products: SSO setup with Google App SAML: Required fields, XML file, and other info
- Wasp Cloud products: SSO setup with Okta SAML: Required fields, XML file, and other info
Note: Use of the resources described here requires internet access.