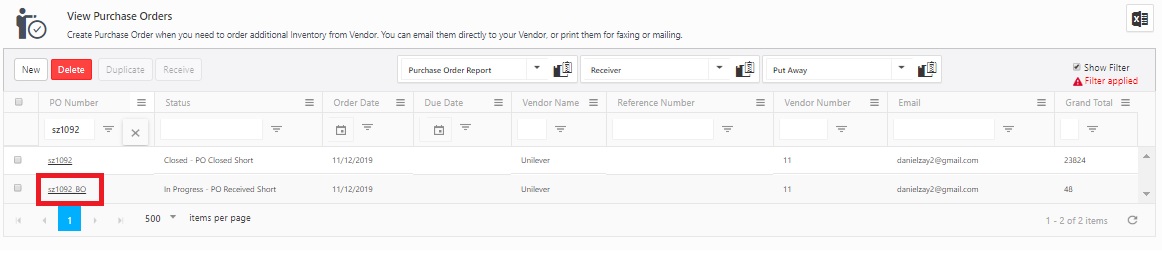
Receive Inventory
When you begin receiving inventory on a purchase order you created in the system, you will mark that inventory as received on the Receive screen. This screen allows you to select which purchase order you are receiving and mark individual items on that purchase order as received at a specific location. You can also optionally view costing information on this screen.
If the Allow Over Receive option is enabled in the Settings screen, the users can mark more inventory as "received" than is indicated on the Purchase Order. This applies to PC and mobile devices. Similarly, If the Auto Close Purchase Order is turned On, the purchase order closes automatically when all requested inventory has been received completely. Refer to Settings > Ordering to view Purchase Order and Receive Order-related settings.
The receive Inventory option is also available on iOS and Android devices.
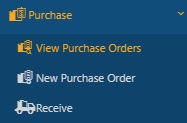
- Click on Purchase > Receive.
- The Receive screen will appear.
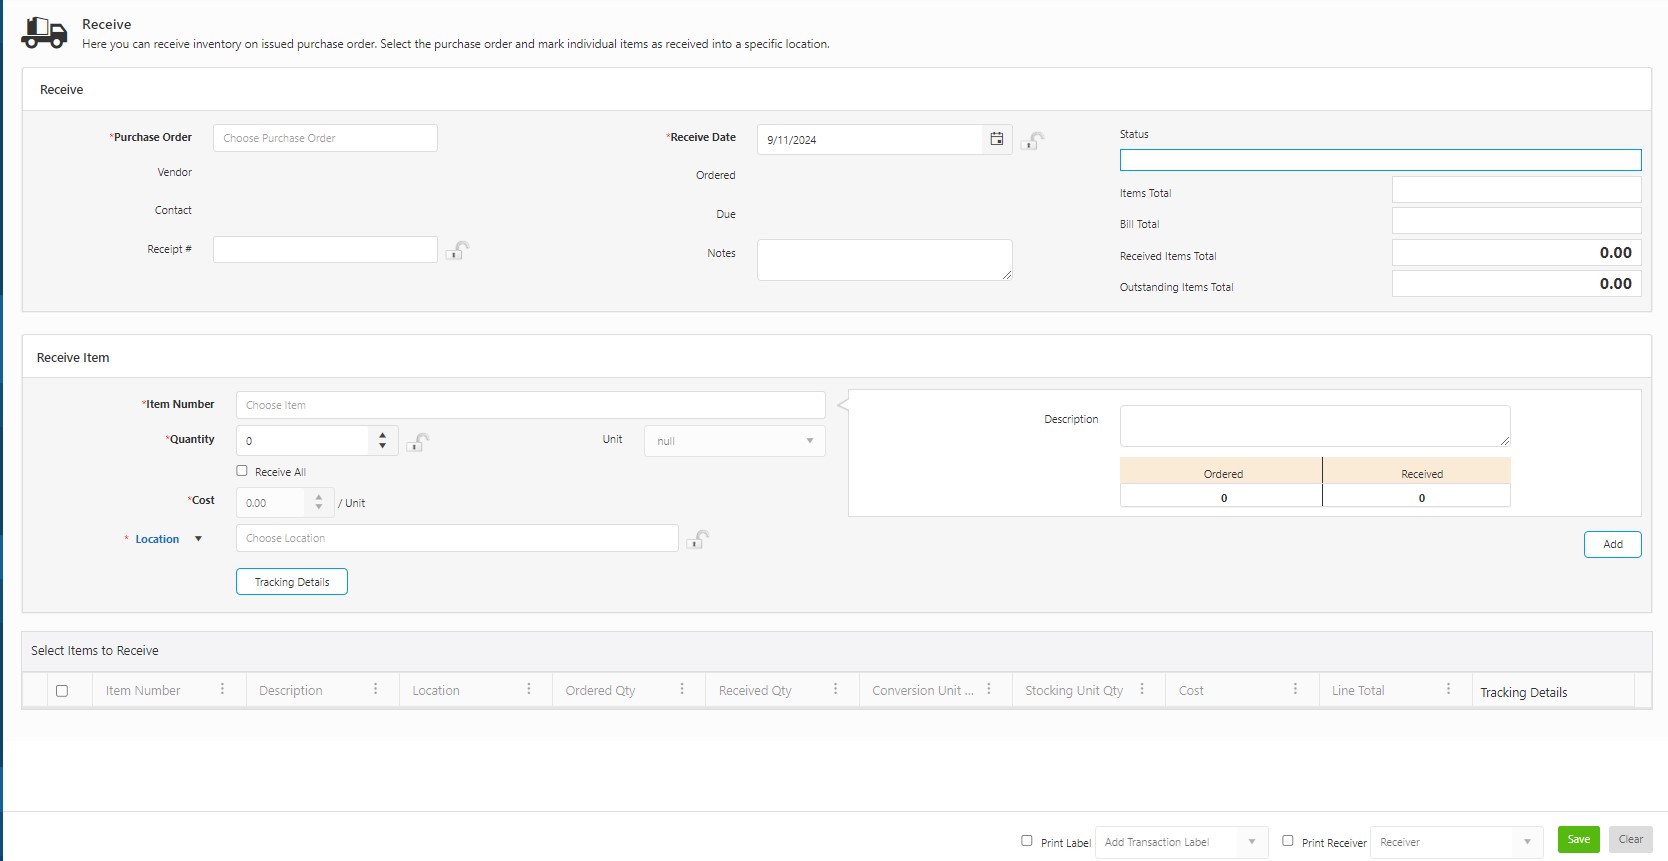
Receive
Note: The site name will be displayed next to Receive if the order is assigned to a site.
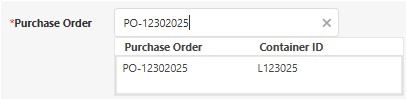
- Purchase Order - Select the purchase order or container ID. When you select a purchase order/container ID, the screen will populate with the information related to that order. For example - Vendor, Contact, Ordered, and Due Date. Note: The container feature is scheduled for a future release.
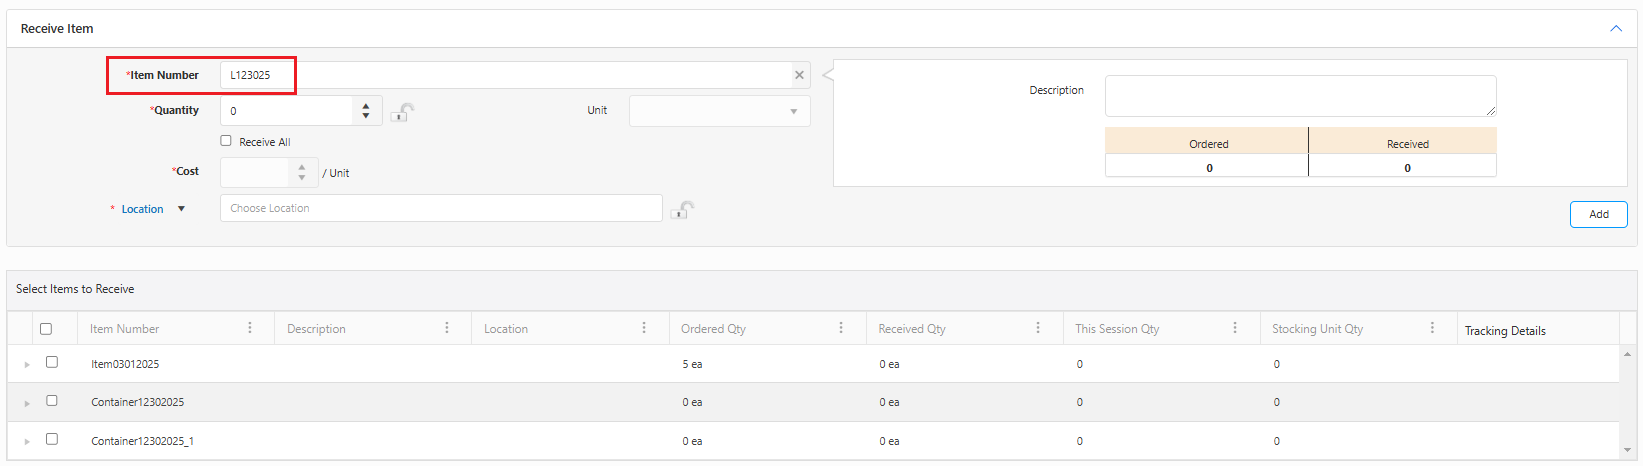
- Option to choose Container ID - You can enter the Container ID in the Purchase Order field to automatically include all items or containers within the parent container. When you scan the Container ID, all items within the container will automatically populate in the "Select Items to Receive" section. To enable this functionality, one of the following conditions must be met:
- Containers and their items have been added during the creation of the Purchase Order.
- The ASN (Advanced Shipping Notice) file has been imported with all container details.
Note:
- Scanning a Container ID in the Purchase Order field auto-populates the Item Number with the Container ID and the Purchase Order field with the corresponding Purchase Order number.
- When the Site Restriction is Enabled (Manage > Roles > Site Restrictions), the user will only see the Global Purchase Orders that are not assigned to any site and Local Purchase Orders assigned to a site where the user has access.
- With Working Sites Enabled, the user will see the purchase orders available on the allowed sites. Also, they can find other Purchase Orders by typing the exact Purchase Order number/name provided the number/name should be the exact match and is within the site permissions.
- Receipt Number - Enter the receipt number, if any.
- Receive Date - Update the receive date, if required.
- Notes - Add notes, if any.
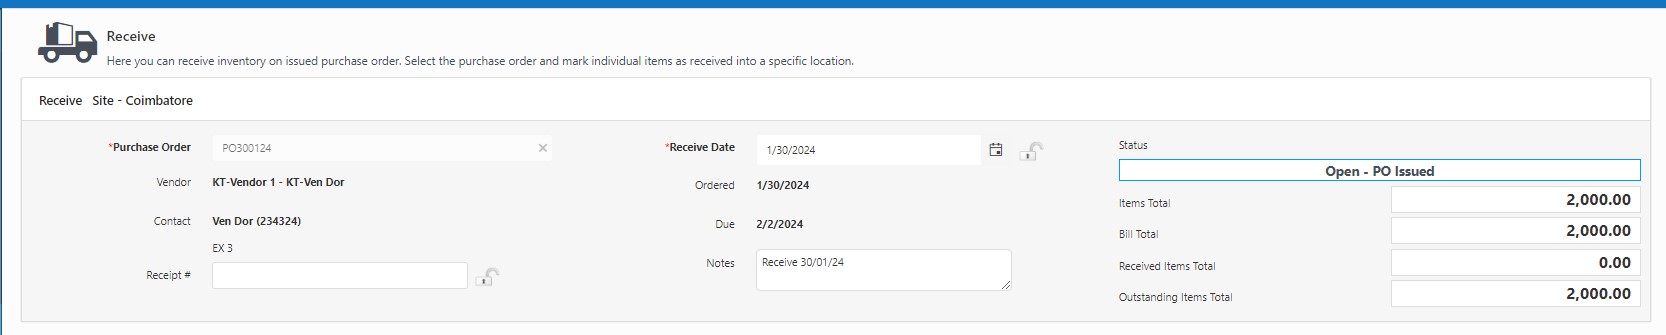
- Status - This status message changes based on the Receive order's status.
- Custom Fields - These will be read-only fields. The fields will be enabled only on the Purchase Order screen. The purchase order custom fields are added on the Form customization screen.
- Calculations:
- Items Total: The aggregate cost obtained by multiplying the quantity of each item by its respective cost.
- Bill Total: It is the asset total above which the shipping costs and tax percentage are applied.
- Received Items Total: The cost of the overall quantity of received items. As items are partially or fully received, it reflects the cost of the received items.
- Outstanding Items Total: The outstanding amount yet to be received, calculated by subtracting the Total Received Items Value from the Total Items Value.
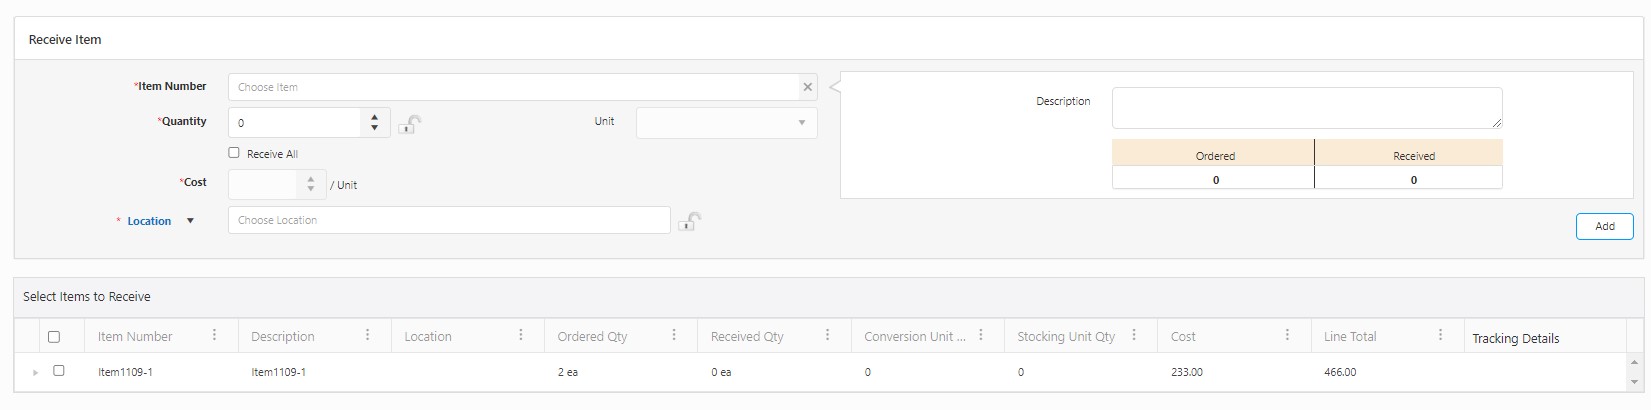
Receive Item Section
- When you select a Purchase Order number in the Purchase Order field, the items to be received will automatically populate in the "Select Items to Receive" section. Note that the purchase order can be created for an item or a container. You can receive an item or a container in a regular location or within another container.
- Scanning a Container ID on the Purchase Order field will auto-populate the Item Number with the Container ID and the Purchase Order field with the corresponding Purchase Order number.
- Updating the Information of Items to be Received:
- You can select an item from the dropdown and update the remaining information, or
- You can select an item in the Select Items to Receive queue. The row will be highlighted, and the details related to the selected item will be populated in the Receive Item section.
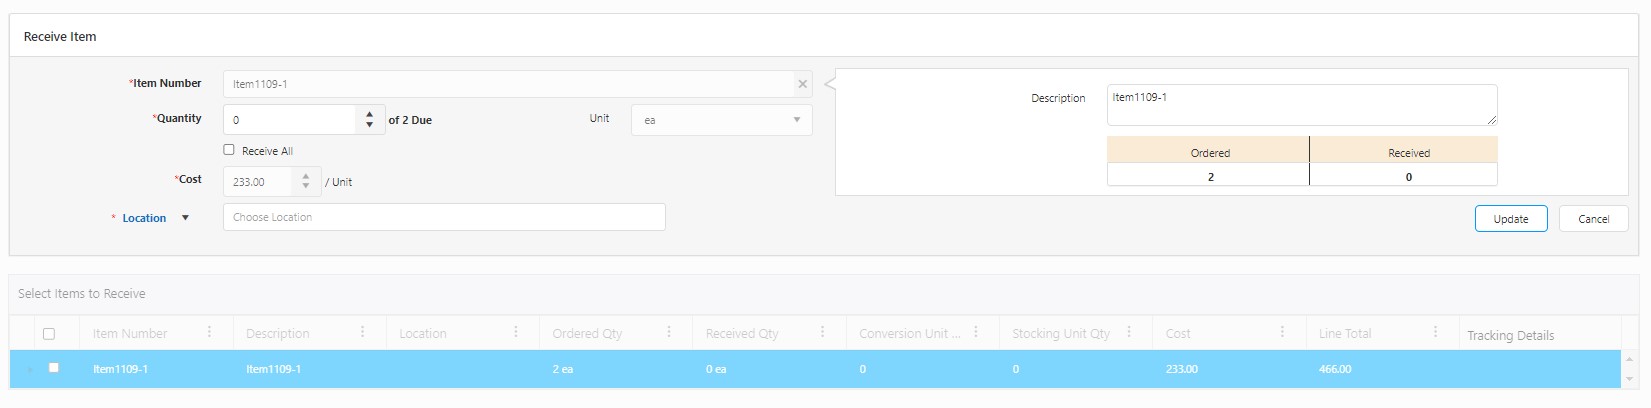
- Item Number - Use the dropdown to select the item number, or it will automatically populate if you have selected a row in the "Select Items to Receive" queue.
- Quantity - Enter the Quantity received. The unit will default to the vendor's shipping unit entered in the purchase order. You can change this if needed, but be aware that it will change the amount you are receiving.
- Receive All - Click on the checkbox if you are receiving all the ordered quantities.
- Cost - The cost will be automatically calculated based on the quantity selected.
- Location/Container - You can select the location or a container ID to receive an item. Select the location or container from the dropdown.
- If the item has a Primary Location, the location field will automatically populate. Otherwise, click on the dropdown to manually select a location.
Note: While receiving the order, if the item to be received (in the queue) falls in the Site-Item/category restrictions, then a warning message will appear indicating that "Transaction disallowed due to existing site/category restrictions” and the location field will be restricted, i.e., it will not display or allow to select the location.

- You can receive items in a container.
- You can receive additional containers into an existing container group (Container ID) if needed. For example, if the system already has a container with ID "PTI1" for Container131224-T, and a purchase order is created for 3 more Container131224-T, you can add the new containers to the existing container group with ID "PTI1" upon receipt.

- The location/container field is an autocomplete dropdown for selecting either locations or containers. If "Container" is selected and no containers match the search (with a non-empty query), the dropdown automatically switches to search for locations. The same logic applies when "Location" is selected. The field name updates dynamically between "containers" and "locations" based on the search results.
- When a location is selected, the site and location information are displayed. If a container is selected, the site-location-container ID is shown.
- The location field will display the site and location name when hovered over with the mouse. Likewise, hovering over a selected container will show the site, location, container type, and container ID.
- The Tracking Details button will appear if the item has any TrackBys. Click the Tracking Details button to enter tracking information. The tracking details can also be updated in the Select Items to Receive - Tracking Details grid.
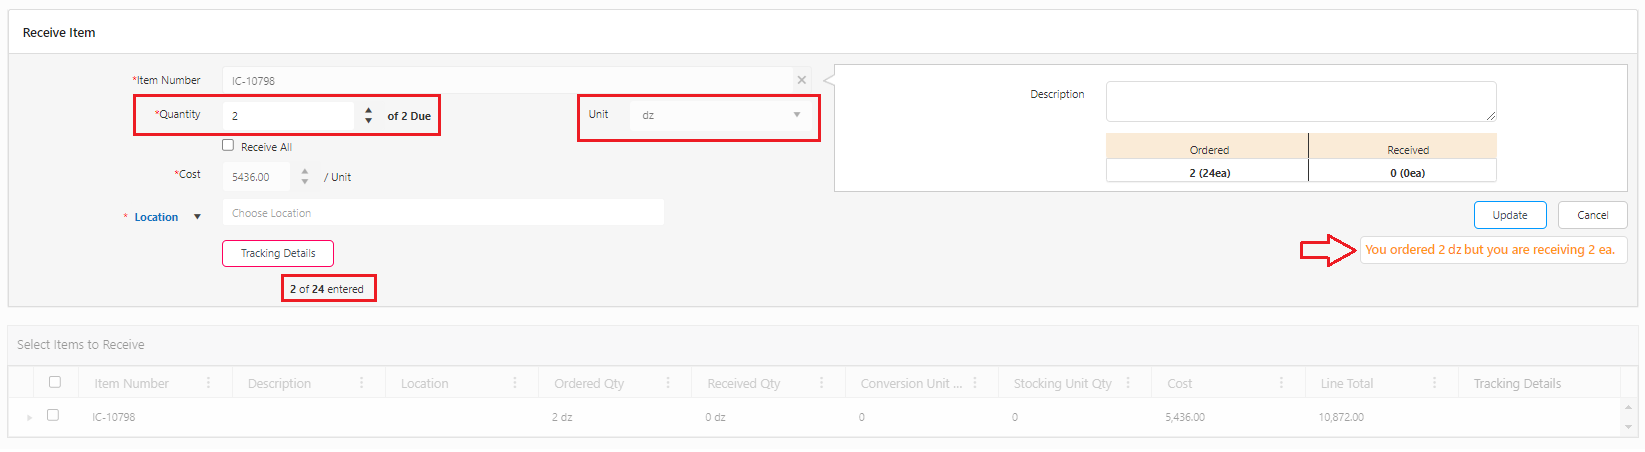
Note: Accurate tracking based on Unit of Measure (UOM) is essential to avoid errors in quantity mismatch during order processing.
For example, if the Unit of Measure (UOM) is configured as 'Dozen' with a conversion factor of 1 Dozen = 12 Items, and a purchase order is generated for an item tracked by serial number, specifying an ordered quantity of 2 Dozen (equivalent to 24 items), the user is expected to input 24 serial numbers upon receiving the quantity. In case the user mistakenly enters only "2" serial numbers, assuming that's sufficient, an alert will be triggered indicating a UOM mismatch: "You ordered 2 'Dozen,' but you are receiving 2 'items.
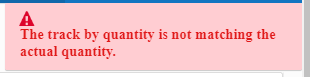
Note: The track by quantity should match the actual quantity. The system will not allow you to save or save and close until all the track by values is entered. On trying to save (or save and close, or save PO and create back order), the message will appear, indicating the same.
- Click the Add/Update button, depending on the option used to update the information for the item to be received. The Add button will appear when an item is selected from the dropdown and the remaining information is updated, while the Update button will appear when an item is selected from the Select Items to Receive queue and the information in the upper grid of the Receive Item section is populated.
Select Items to Receive
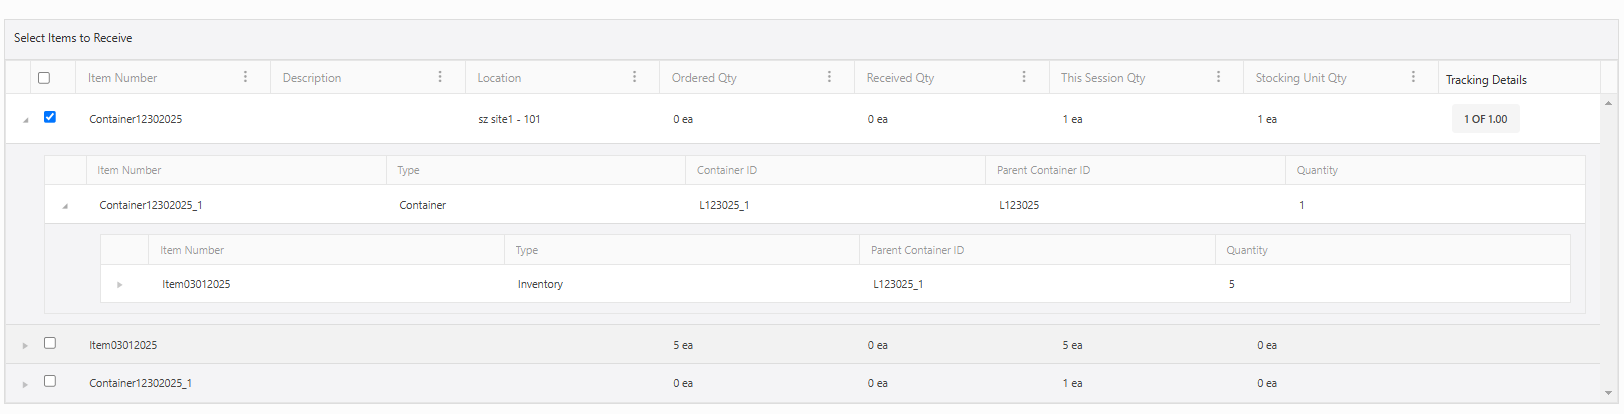
- Once all the details are updated and added to the queue, the items received individually will appear as a single line item. However, if you are receiving a container with items inside it, the items will be displayed in a hierarchical form, showing which items are inside which container.
- Ensure that the items you want to receive are checked before proceeding to save and close the Purchase Order.
- If you want to print a label or receiver, check the Print Label and Print Receiver checkboxes. You can also add the transaction label name and edit the receiver name details.
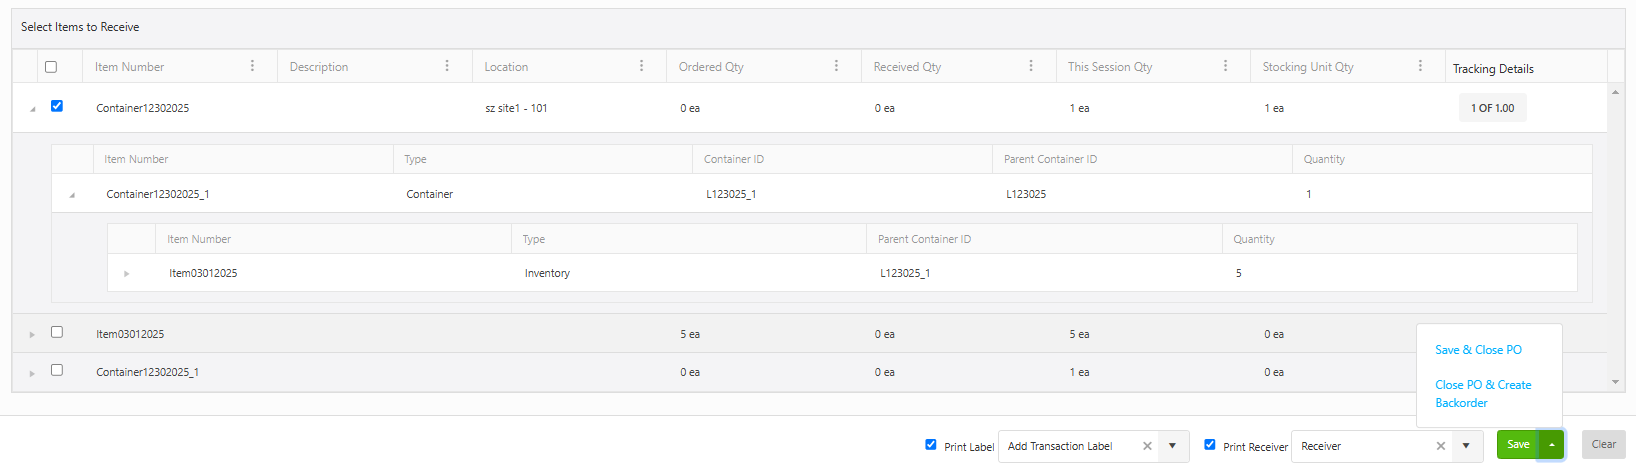
- Click on the Save and Close PO or Close PO and Create Backorder.
- Save and Close PO - The purchase order will get saved and closed.
- Close PO and Create Backorder - The purchase order will get closed, and a backorder will get created. Note that only the purchase order with a quantity less than ordered while receiving can be closed.