View Low Stock Items
View Low Stock Items screen lists all items below the minimum stock level. The minimum and maximum stock levels are added in the Locations and Sites tab of the Inventory and Assembly screen. The screen also provides an option to access the New Purchase Order screen. You can create a new purchase order for an item just by selecting the item and using the Order Low Stock button.
Note that a low stock notification can be configured to be sent via email to specific users or all users, and/or to appear below the notifications bell icon section.
View Low Stock Items
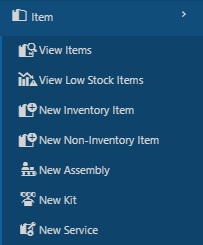
- Click on Items > View Low Stock Items.

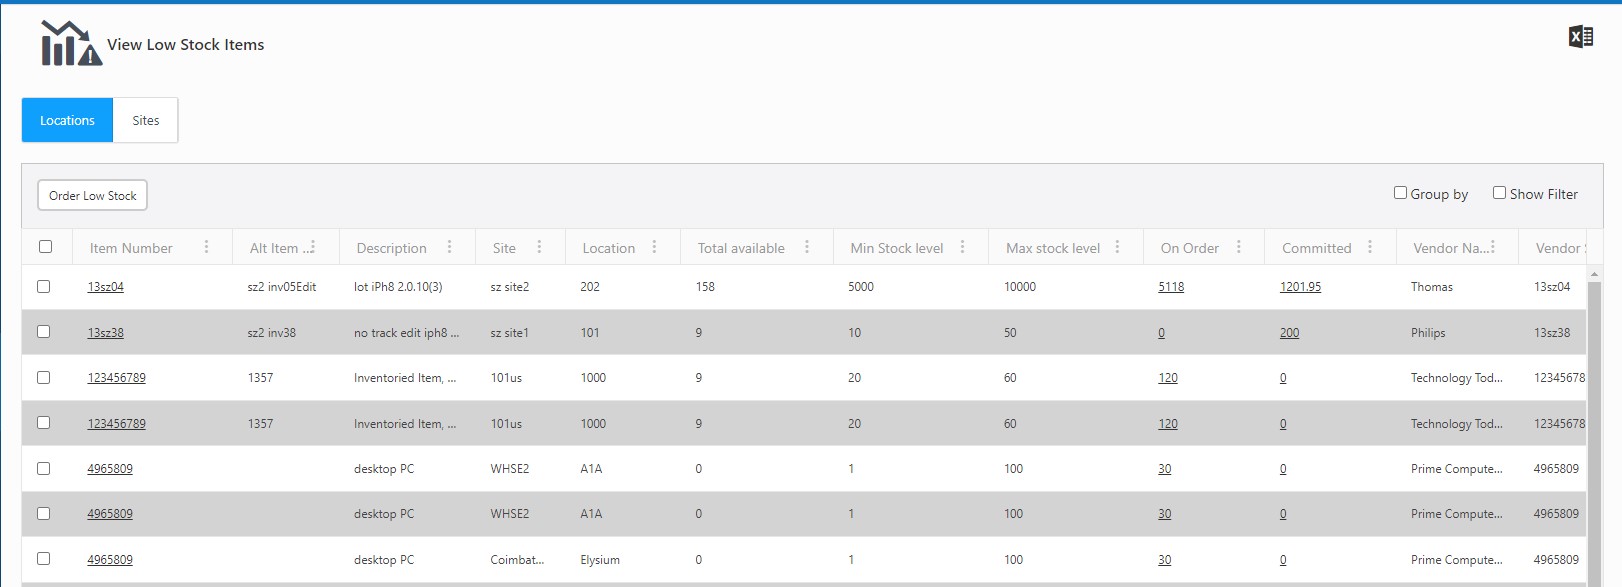
- The View Low Stock Items screen has two tabs - Locations and Sites.
- The Locations tab will display the items in a location with a quantity less than the minimum stock level.
- The Sites tab will display the items on a site with a quantity less than the minimum stock level.

- The View Items screen will display the details like Item Number, Alternate (Alt) Item Number, Description, Site, Location, Total Available, Min Stock Level, Max Stock Level.
- On Order: Displays the total items on purchase orders that haven’t been received yet. The Quantity is a link that will navigate to the Order tab of the View/Edit Inventory Item screen.

- Committed: Displays the total items on pick orders that haven’t been picked yet. The Quantity is a link that will navigate to the Order tab of the View/Edit Inventory Item screen.

- Show Filter: When you click on the Show filter checkbox, a text box will appear under each field where you can type the search text to find the desired detail.
- Group By - The Group By feature allows you to "group" the displayed information in the View Low Stock Items screen. Depending on how you want to view your information, you can have one group, two groups, or many. To use this feature, click on the Group By checkbox and drag and drop the columns. Based on the selected column, the information will be grouped and displayed.

- Export: This option allows you to export the list of low-stock items to an Excel spreadsheet. Filter the list as needed, then select the Export icon -
 . The report will get downloaded. In many browsers, the downloaded file can be accessed using an icon at the bottom or edge of the browser. Refer to your browser’s help for more information about finding your downloaded files. You can save or alter the report as needed in Excel.
Order Low Stock
- The Order Low Stock button is used to order items on a location or site with a quantity less than the minimum stock level.
- Select the Location tab/ Sites tab.
- A new purchase order can be created from the View Low Stock Items screen.
Note: The minimum stock level, maximum stock level, and reorder quantity can be set while adding/editing Inventory items/assembly items. Refer to the Location tab in the Inventory Item / Location tab in the Assembly Item / Sites tab in the Inventory and Sites tab in the Assembly screen.
- Select the item by clicking on the checkbox next to the Item number. Note: You can also select multiple checkboxes.

- Click on the Order Low Stock button. The screen will navigate to the New Purchase Order screen.
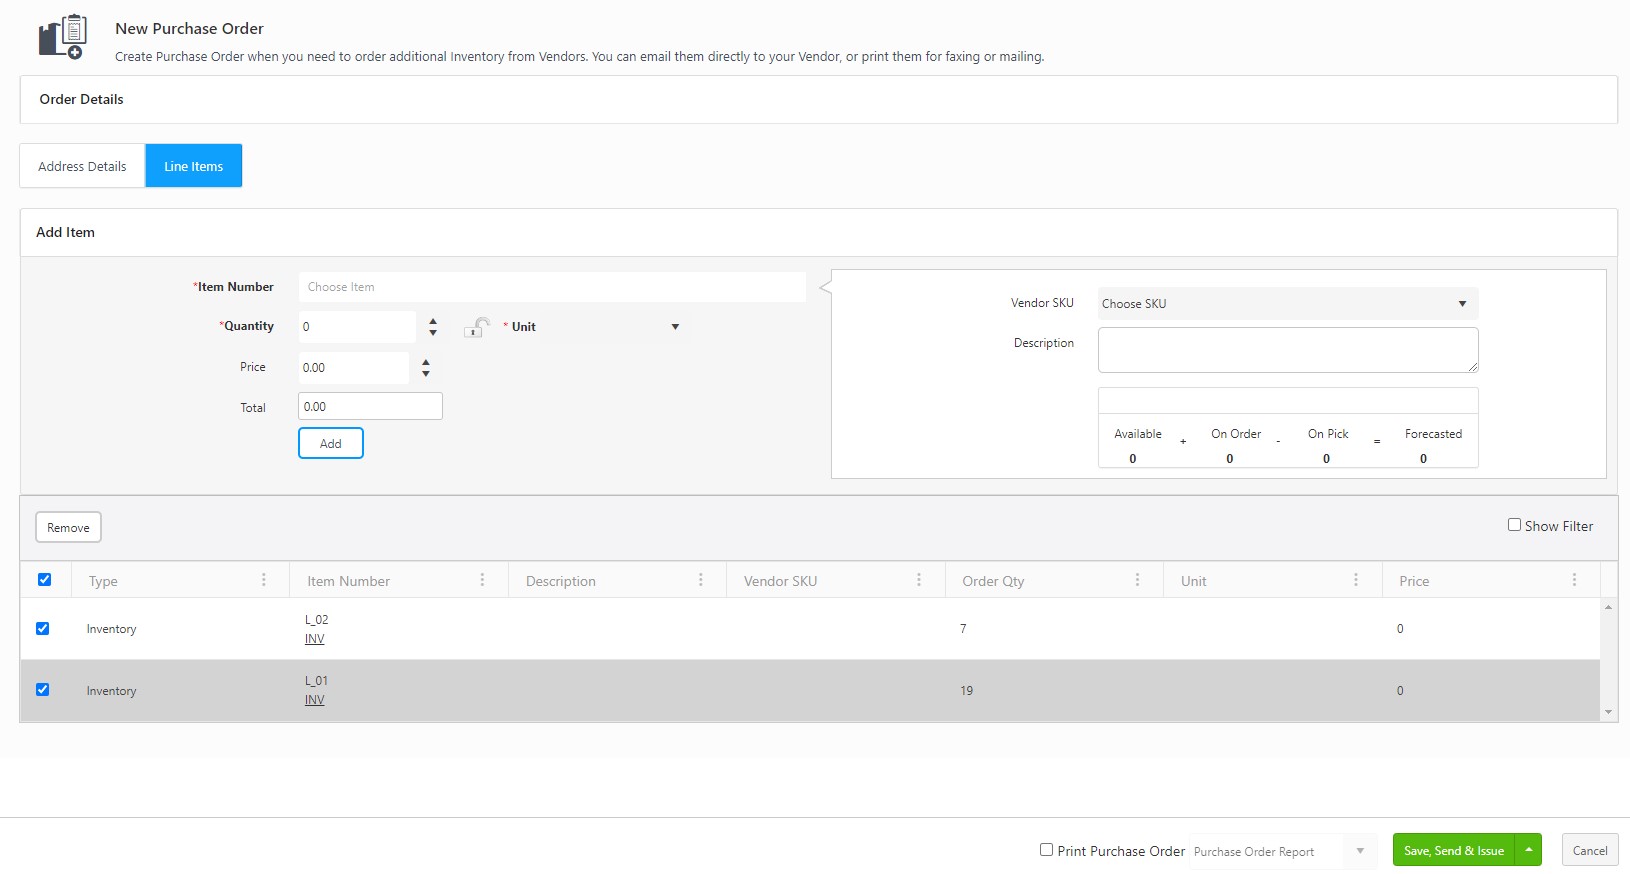
- The New Purchase Order screen will display the Items under the Add Item grid. The Quantity field in the Add Items and the Order Quantity in the Queue will display the reorder quantity if filled while adding/editing the inventory item.
- Note: In the View Low stock items screen, consider that you have selected an item kept at two locations. Example item "L_01" at Warehouse 1 and Warehouse 2.
- In the New Purchase order screen, the Add items queue will display the selected item at two locations as one item. The Order Quantity will display the sum of Reorder Quantities entered for the item at two locations. For Example, L_01 at Warehouse 1 with reorder quantity of 11, and Warehouse 2 with reorder quantity of 8. The Order Quantity will display 19 for L_01 on the New Purchase Order screen.

- PO Number - Enter the PO Number for this new purchase order. If you have set up InventoryCloud to generate PO numbers automatically, the field will say "Automatically Assigned,"
- Enter the order, address, and item details. Refer to the New Purchase Order topic for details.
- To print the purchase order, click on the checkbox next to Print Purchase Order. Note: In case the pop-ups are blocked, and you are unable to view the print receipt, Refer to Popups and Redirects to allow pop-ups and to view the print receipt.
- Click the Save, Send and Issue button when you are ready to complete the purchase order. The order will be sent to the email indicated on the purchase order. You can also click on the Save not Send button if you do not want to send the purchase order and want only to save the details. The Save not Send button will appear when you click on the drop-down button next to the Save, Send and Issue button.

- A message will appear indicating that the purchase order is successfully issued, and a print receipt will also get generated (if the Print checkbox option is selected)