View Purchase Orders
The View Purchase Orders screen allows you to view and access all purchase orders in your database.
View Purchase Orders Screen
- Click on Purchase > View Purchase Orders.

- The View Purchase Orders screen will appear.

Note: Overdue Purchase Orders will be highlighted in pink color in the list.
- Show Filter - When you click the Show Filter checkbox, a text box will appear under each field. Use a modifier or enter the text that you want to search. Once you apply the filter, the message "Filter applied" will appear under the Show Filter checkbox.

- Export - This option allows you to export the list of purchase orders to an Excel spreadsheet. You can export up to 25000 records, and it also allows you to customize the list as needed using filters/custom views/grouping and then export the information to Excel. Filter the list as required, then select the Export icon -
 . The report will get downloaded. In many browsers, the downloaded file can be accessed using an icon at the bottom or edge of the browser. Refer to your browser’s help for more information about finding your downloaded files. You can save or alter the report as needed in Excel.
 - Quick Links - Right-click on the Purchase order. Two options will appear - Send PO and Receive. Send PO will issue the PO to the vendor. The status will change to PO-Issued. The Receive option will navigate to the Receive Inventory screen.

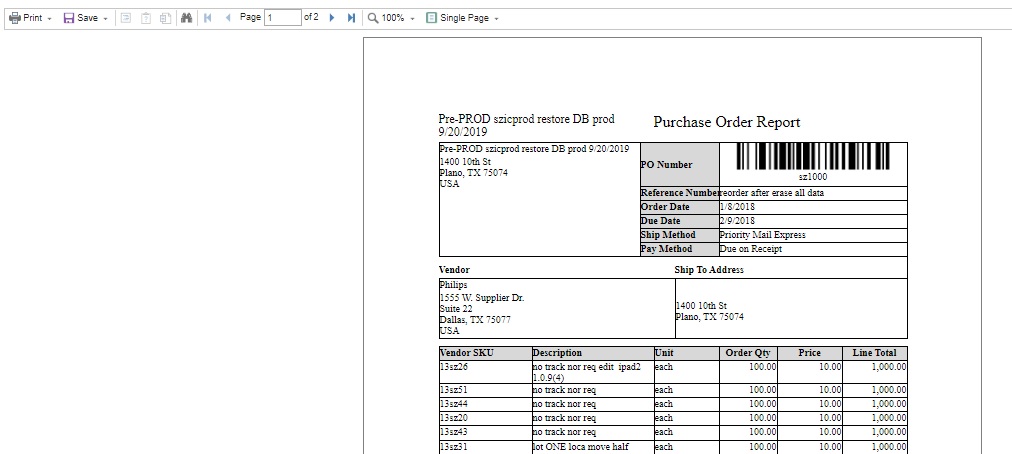
- Generating Reports: This option allows users to generate a Purchase Order Report, Receiver, and Put Away Report. Select the PO Number by clicking on the checkbox, select the type of report that you want to generate, and click on the Print button.

Preview of Purchase Order Report

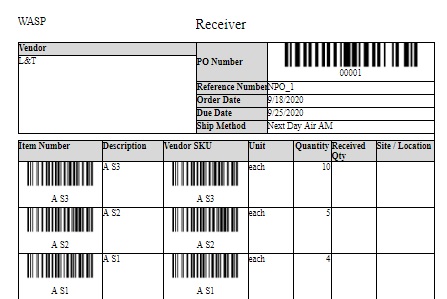
Receiver Report - Select the PO and click on the receiver report button. The report will display the item number, description, vendor, unit, quantity, received quantity, and Site/location.

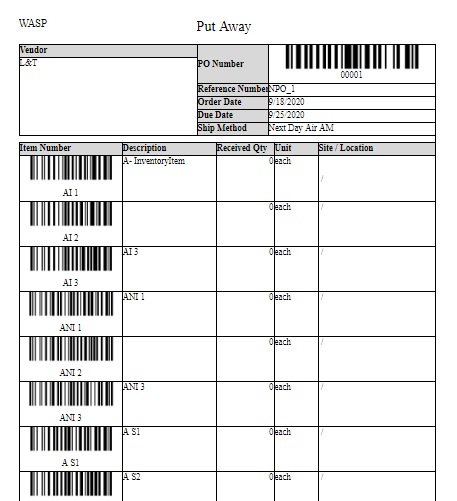
Put Away Report - Select the PO and click on the Put Away report. It will generate a report and display where the inventory will be put away or stored. The report will show the following details - Item Number (barcode), Description, Received Qty, Unit, and Site / Location.

New Purchase Order
The New button allows the user to create a new purchase order.
Click on Purchase > View Purchase Orders > New.

The screen will navigate to the New Purchase Order screen. Refer to the topic New Purchase Order for more details.
View/Edit a Purchase Order
The View /Edit Purchase order allows users to edit the purchase order-related details.
Click on Purchase > View Purchase Orders.
Search for the Purchase Order to be edited.
Click on the PO number.

The screen will navigate to the View/Edit Purchase Order screen. Refer to the topic View/Edit Purchase Order for more details.
Delete a Purchase Order
Click on Purchase > View Purchase Orders
Search for the Purchase Order to be deleted. Select the checkbox next to the PO number.
Note: The purchase order with the status ‘Draft’ can only be deleted.
Click on the Delete button.

A pop-up message will appear asking for confirmation.

Click on the Delete button again.
A message will appear indicating that "1 purchase order is deleted successfully".
Duplicate a Purchase Order
You can create a duplicate copy of a particular purchase order using a Duplicate button.
Select the Purchase order and click the Duplicate button to duplicate a purchase order.

The screen will navigate to the Duplicate Purchase Order screen. Refer to Duplicate Purchase Order for more details.
Receive Purchase Order
The receive button will navigate to the receive inventory screen. The Receive button is used to enter the item received for a particular purchase order.
- Click on Purchase > View Purchase Orders.
- Select the Purchase order.
- Right-click on the PO number and click on the Receive button.
 Or
Or
Click on the Receive button. The screen will navigate to the Receive Inventory screen. Refer to Receive Inventory for more details.
