Build Assembly Item
The Build screen allows you to build an assembly. Building Assembly Items is a "manufacturing" portion of the application. To build an assembly, you should add the items or bill of materials (BOM) required to build an assembly, and it is added on the new Assembly Items screen (refer to Adding a New Assembly).When you Build an Assembly Item, the quantity of assembly is increased, and the number of items/ bill of materials (BOM) required to build an assembly is reduced by the number needed to make an Assembly Item. So, Building Assembly Items increase inventory for the assembly item in the same way that adding transactions increases inventory for item types.
Note: You can add Assembly Items through the Adjust and Audit functions. Doing this will not affect the inventory quantity of the items/BOM. You should only add Assembly Items using these functions if you want to add inventory to an Assembly Item due to a return or Audit discrepancy.
- Create an assembly (refer to Adding a New Assembly) and add the Bill of materials required to build one assembly.
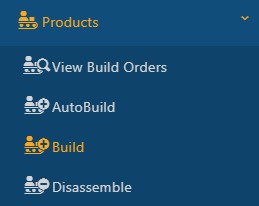
- Click Products > Build.
- Build Screen has three tabs - Assembly, Pick Items, and Assign Tracking.
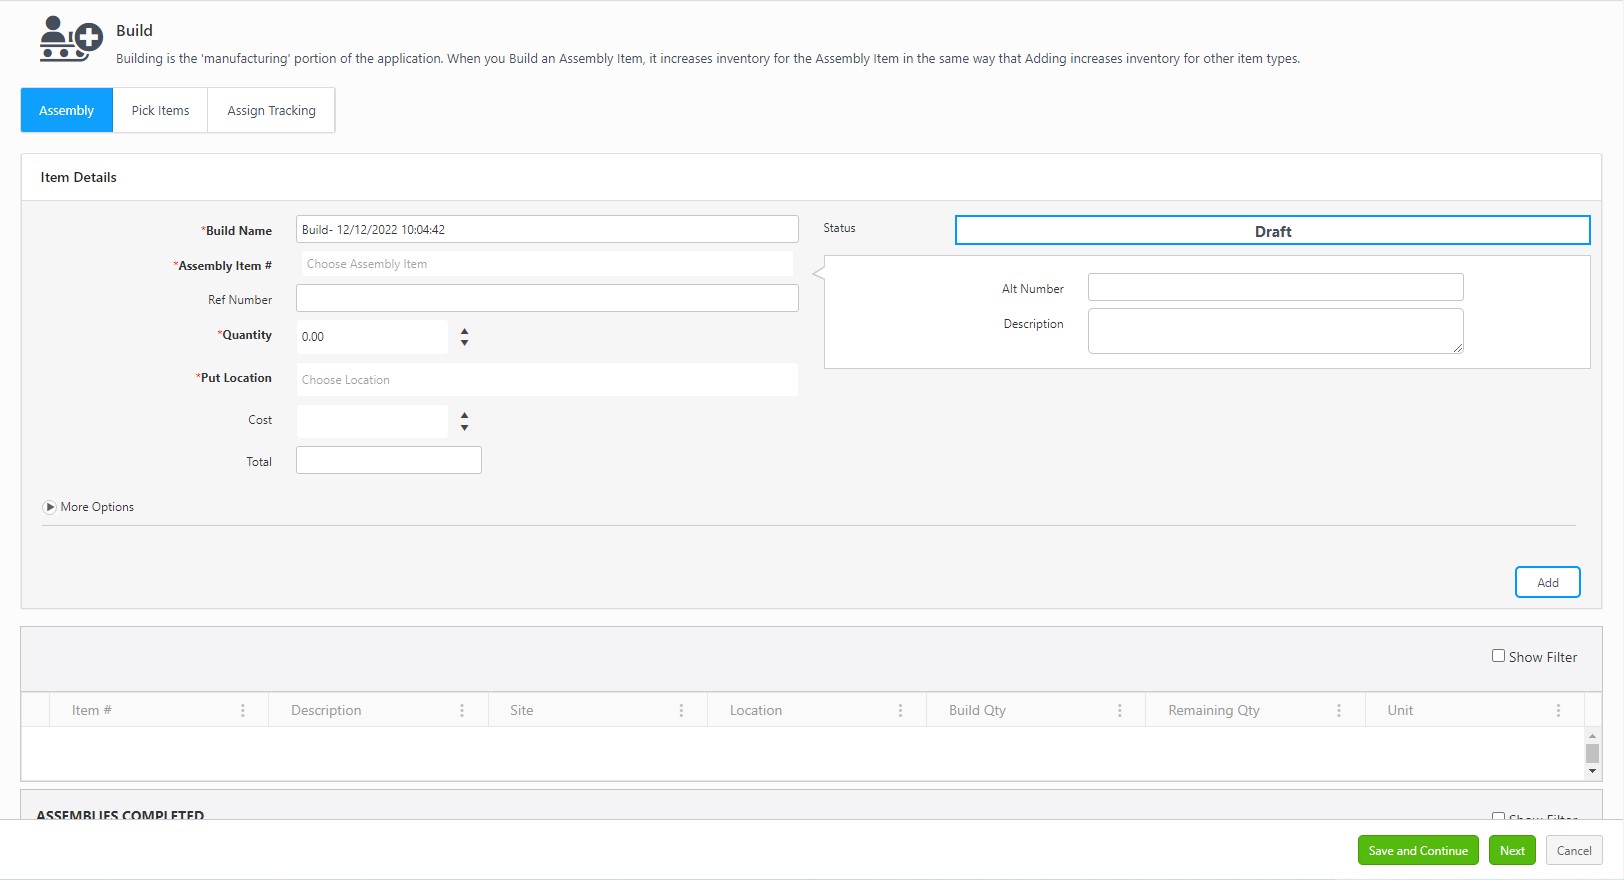
Assembly Tab
- Item Details - Add the following details:
- The status would be "Draft" before creating a build order.
- Build Name - Enter the build name or use the default build name displayed on the Build Name field "Build - Date and Time".
- Assembly Item # - Choose/Enter the Assembly Item.
- The Alt Number and Description will populate based on your selected Assembly Item.
- Reference Number - Enter the reference number.
- Quantity - Enter the quantity you want to build. You can update the quantity of the assembly whenever required. Make sure that you adjust the Pick items too.
- The Cost is automatically calculated based on information entered for the components. This Cost reflects the cost of the entire Assembly Item (including sub-items). Cost is per build and is a required field. The Total Cost is the total cost based on the quantity being built.
- Put Location - Enter a Location for this Assembly Item. The location will automatically appear if a primary location was set for this Assembly Item on the New/Edit Assembly Item screen. You can change this location as needed.
- The Tracking Details button will appear if the Assembly has any Track Bys. On trying to add and track more than the required quantity, an alert message will appear to the user that the number of trackbys entered for the Item number does not match the necessary amount, i.e., NN BaseUnit of ItemNumber items are needed to perform this build. Refer to Tracking Details.
![]()
- Click on More Options. Enter Notes, if any.
- Click on Add button.
- To update the assembly details, click on the entry in the bottom grid. The Item details will get populated in the Item Details section. Make the required changes and click on the Update button.
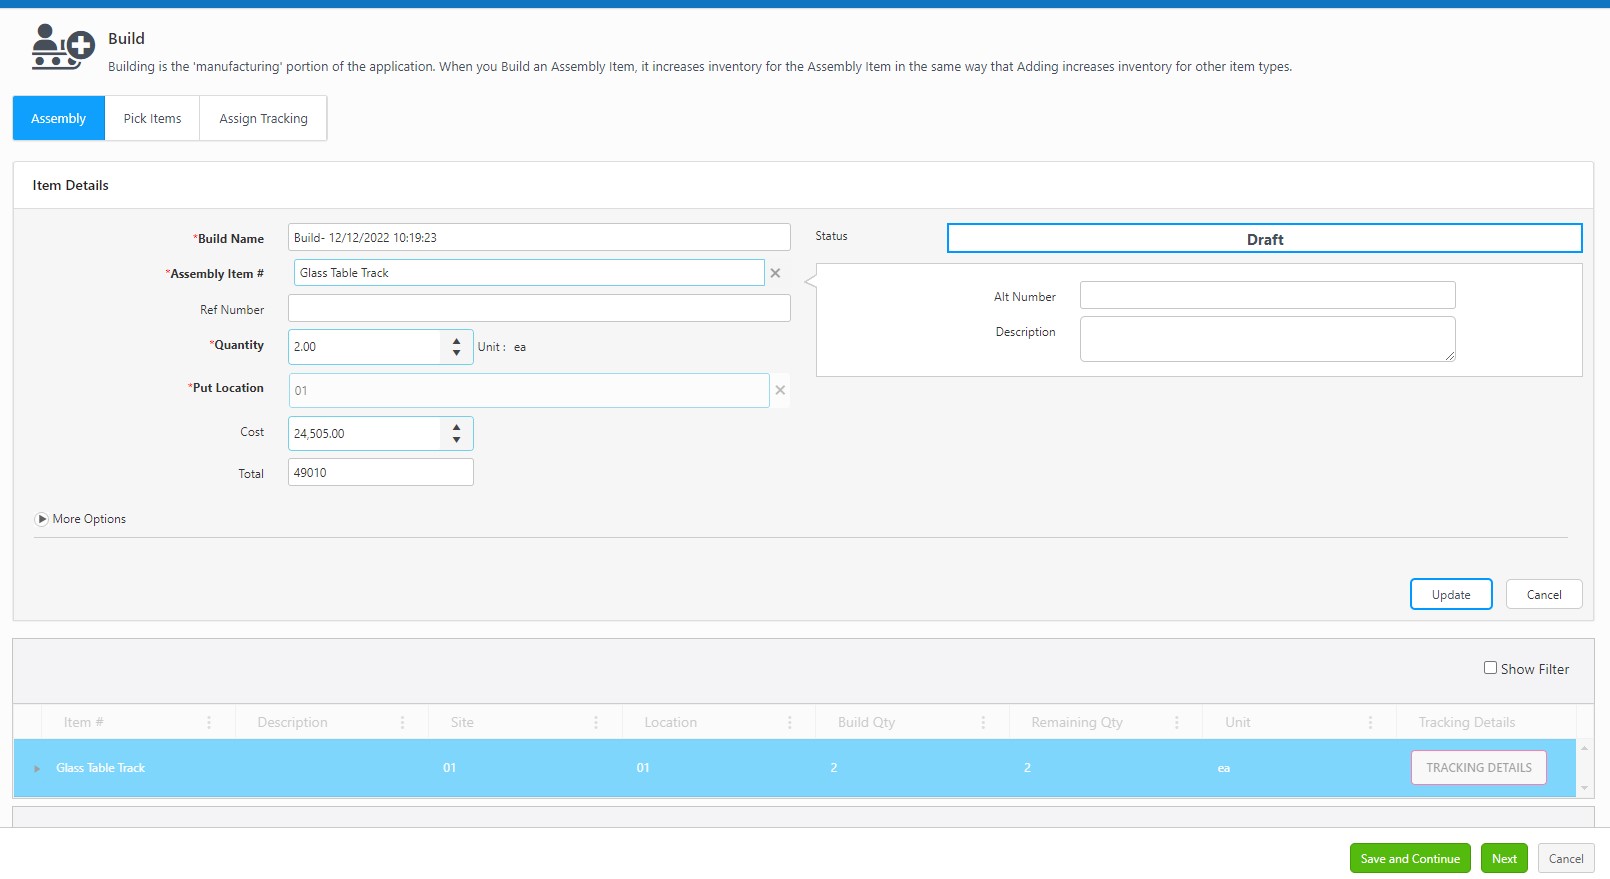
- You can click on the Save and Continue button at this stage and come back later or proceed by clicking on the Next or Pick Items tab. The Status will remain in "Open" when you re-access this Build Assembly from the View Build Orders screen after a "Save and Continue." The status will update to "In-Progress" when you build at least one assembly & still has a few more assemblies to complete.
- Edit Item
- Expand Edit Item to update the Bill of Material. Select the items one by one. Add the quantities to build the assemblies. Add tracking details, if any.
- A red exclamation icon indicates that the number of items does not meet the required quantity to build an assembly fully.
- A green tick indicates that the number of items meets the required quantity to build an assembly fully.
Note: The application allows Partial Build. It is not mandatory to have all the required quantities. All you need is to have enough components/BOM to build a minimum of one assembly.
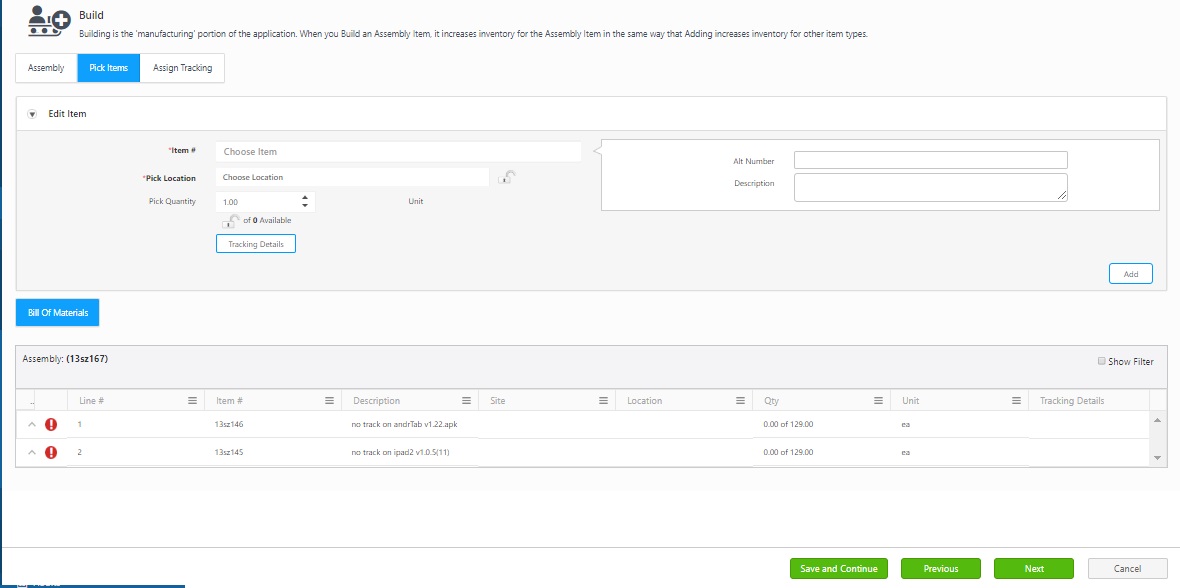
- Click on the line item below the Bill of Materials. The Item details will populate in the Edit Items section.
- Select the Pick Location.
- Enter the Pick Quantity. It will display the available quantities.
![]()
- Update Tracking details. You can update tracking details either in the Edit Items section or through the bottom grid.
![]()
- You can click on the Save and Continue button at this stage and come back later or proceed by clicking on the Next or Assign Tracking tab. Click on the Previous button to access the Assembly tab. The Status will remain in "Open" when you re-access this Build Assembly from the View Build Orders screen after a "Save and Continue." The status will update to "In-Progress" when you build at least one assembly & still has a few more assemblies to complete.
Note: The Save and Continue button will only appear when you are on the Assembly and Pick Items tab.
- Assign Tracking - This is where you can assign tracking information for the assembly item, i.e., the assembly and the components required to build an assembly will be tracked together.
- Select Assemblies to Build - It will display the details of the Assembly and the Bill of materials.
- Assign Picked Items button will appear if you are building more than one assembly and if the assembly and/or BOM have trackbys. You should Assign Picked Items for the assembly that you are building.
- This grid will not have the Assign Picked Items button if the Assembly and the BOM do not have trackbys.
![]()
- The Assign Picked Items button will be greyed out if the Assembly has trackbys and the Bill of Materials does not have trackbys.
![]()
- The Assign Picked Items button will be highlighted in red if both the Assembly and the Bill of Materials have trackbys.
![]()
- Click on Assign Picked Items. Select the Item and select the tracking details. Click Ok and Done. Once done, the Assign Picked Items button will turn gray. Similarly, repeat for the remaining items.
![]()
Partial Build - Partial Build is a feature that allows you to build assemblies slowly, depending on the availability of the components required to build an assembly. Suppose there is enough quantity to build a minimum of one assembly, you can update the assembly quantity in the Assign Tracking grid and the corresponding components/BOM quantity in the “Select Assemblies to Build” grid and perform Build.
Note: Any quantity updates done on the Assign Tracking tab will not change the Assembly quantity in the Assembly tab or the Pick Quantity entered on the Pick Items tab.
- Assign Tracking - Click on the Assembly Name, and the information will populate on the Assign Tracking grid. Update the quantity.
![]()
- Select Assemblies to Build - Click over the quantity below the Quantity Column and update the count.
![]()
- Click Build. A Build Number will get generated.
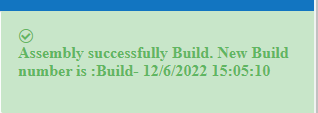
Note:
- An "Insufficient Item" error message will appear, If the items required to build an assembly are insufficient.
![]()
- The "items exceed the required quantity" message will appear if the items needed to build an assembly exceed the limit.
![]()
- Completed Build Assemblies details will appear on the Assembly Tab below the Assemblies Completed grid.

- Cancel Order - You can cancel the Order. The Cancel button appears once the build is started or a partial build is completed. The screen will display the Assemblies Completed information in the Assembly tab.
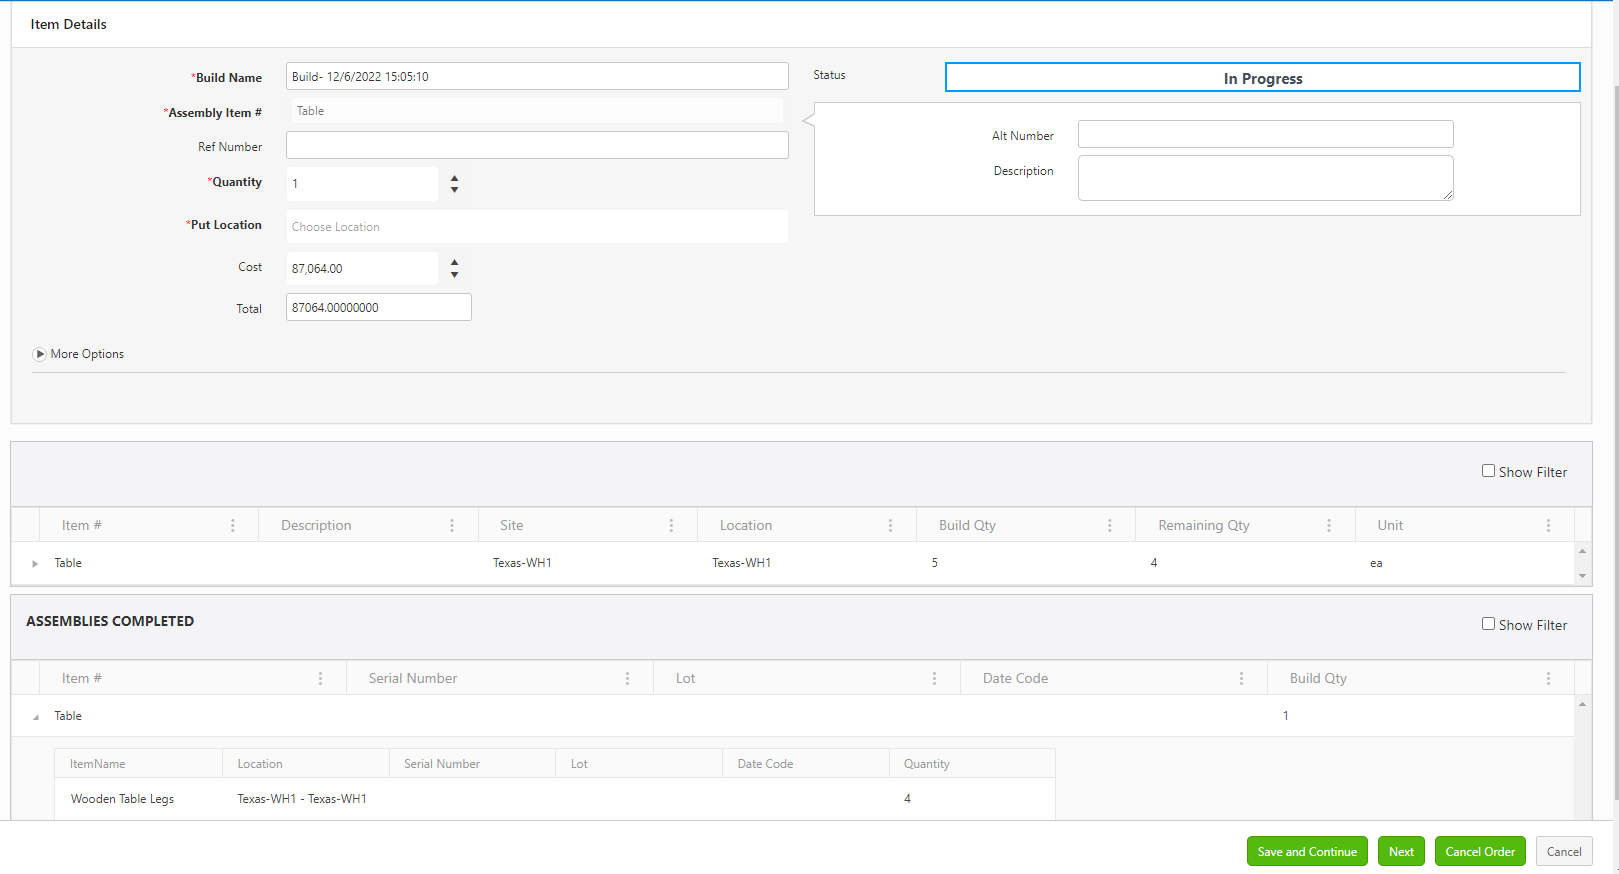
- On clicking Cancel Order, an order status confirmation will appear. Click Yes to continue.

- A message indicating that the "order has been cancelled, and the status is updated" will appear.
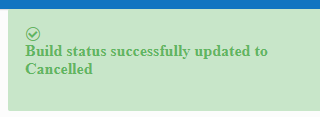
- The order status will update to "Cancelled".

Reopen Order
- The Completed or Cancelled order can be reopened.
- Click on Reopen Order.
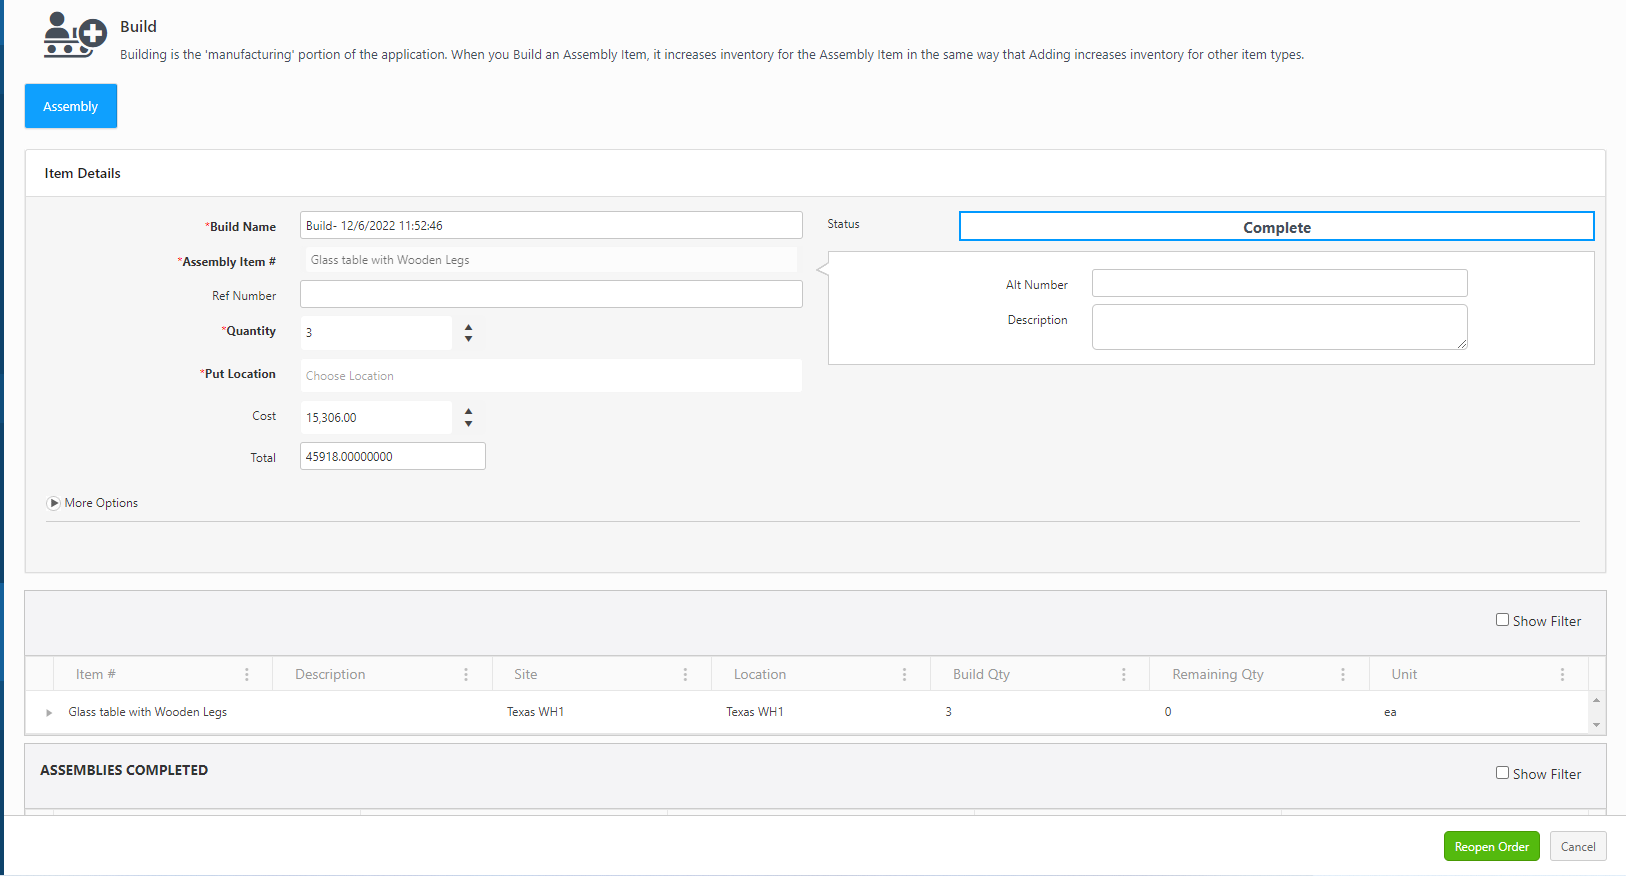
- The Reopened Order will display the Assemblies Completed information in the Assembly tab. The status will show "Reopen."
Note: Partial Build can also be performed in the reopened order.
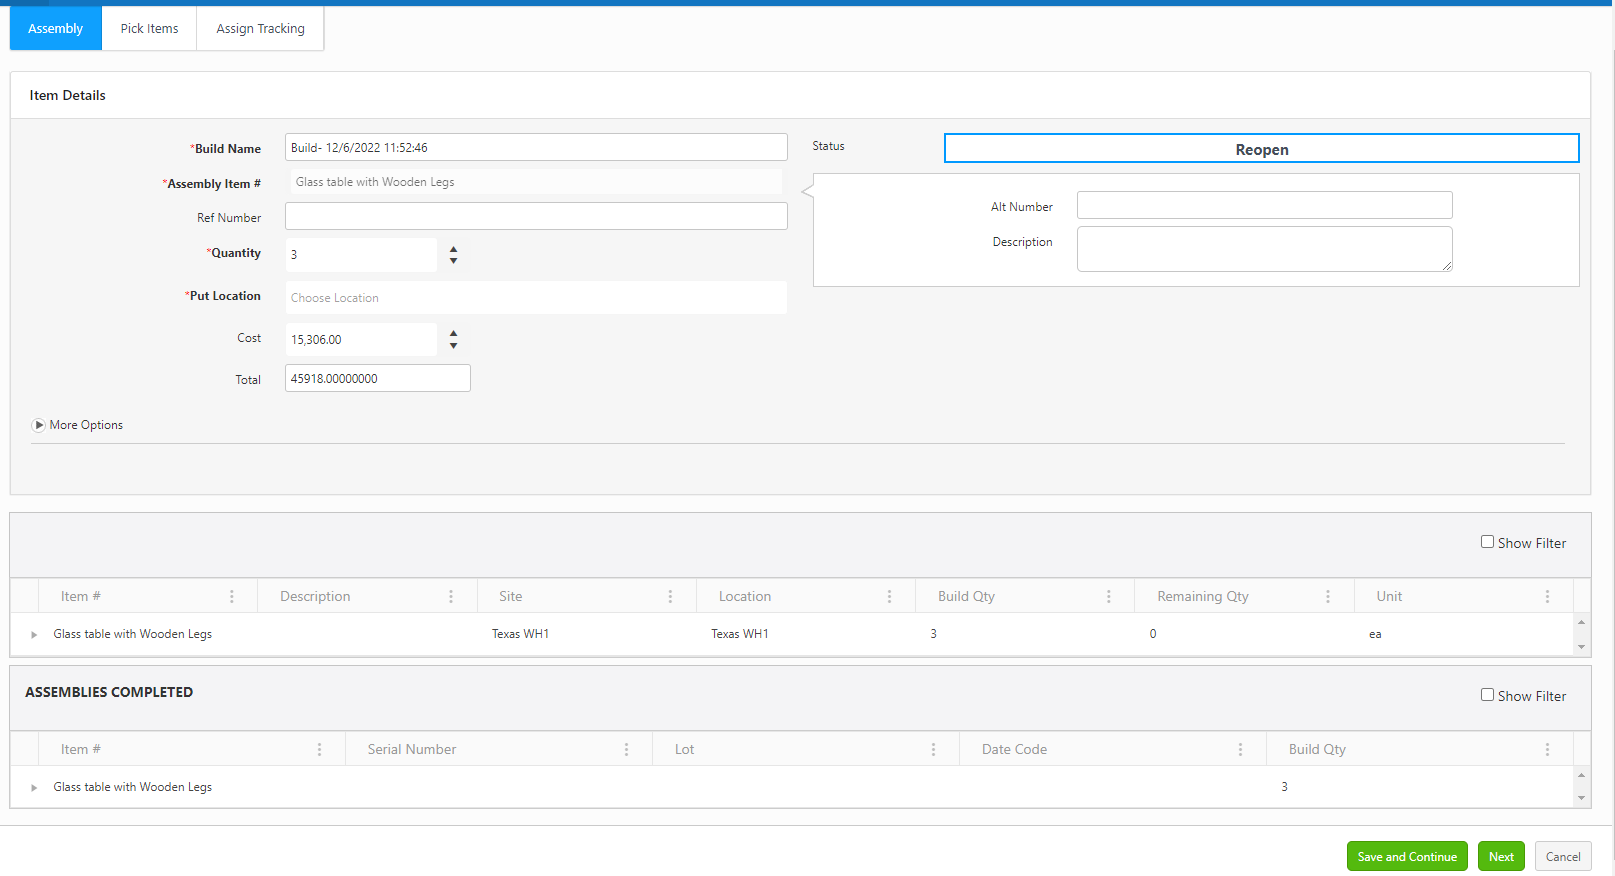
- On the Assembly tab, update the quantity and the put location. Make sure that the remaining quantity is greater than zero.
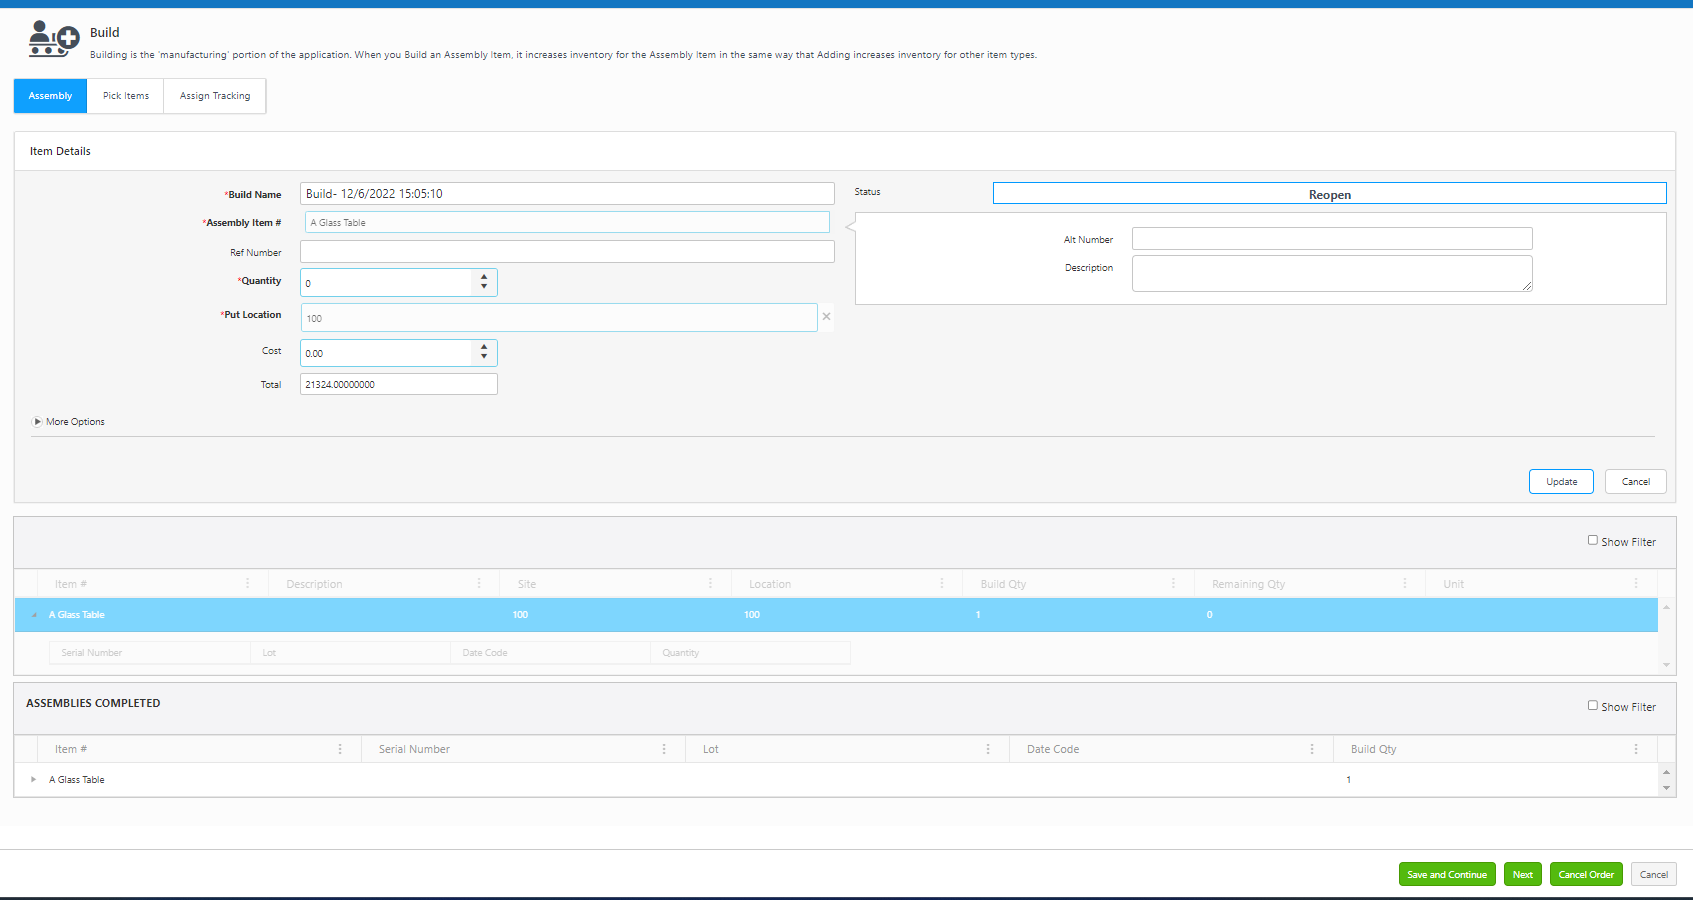
- Pick Order tab - Update pick quantity and pick location. Refer to the topic - Pick Items.
- Update assign tracking. Refer to the topic - Assign Tracking.
- Click on Build.
Note: You can cancel a reopened order. You can also perform a partial build on the reopened order.
- Print Label and Print Receipt Checkbox - Once the Assembly and Pick Items tab is updated correctly, the print label and print receipt checkbox will appear. Click on the checkbox to print a label and a receipt. If you want to change the receipt header name, enter the name in the text box next to the checkbox. Note: If pop-ups are blocked, and you cannot view the print receipt, Refer to Popups and Redirects to allow pop-ups and to view the print receipt.

Print Label

Print Receipt

Statuses
- Open - OK - The "Open" status appears when a build order is created and you have filled in a few details like adding assembly, bill of material (partially or fully), etc, and clicked on the save and continue button.
- In Progress - OK - When you perform a partial build, the status updates to "In- Progress".
- Cancelled - OK - The status changes to Cancelled", when you click on Cancel Order button.
- Reopen - OK - The status changes to "Reopened", when you reopen a cancelled order.
- Complete -OK - The status changes to "Completed" when you complete a build order.
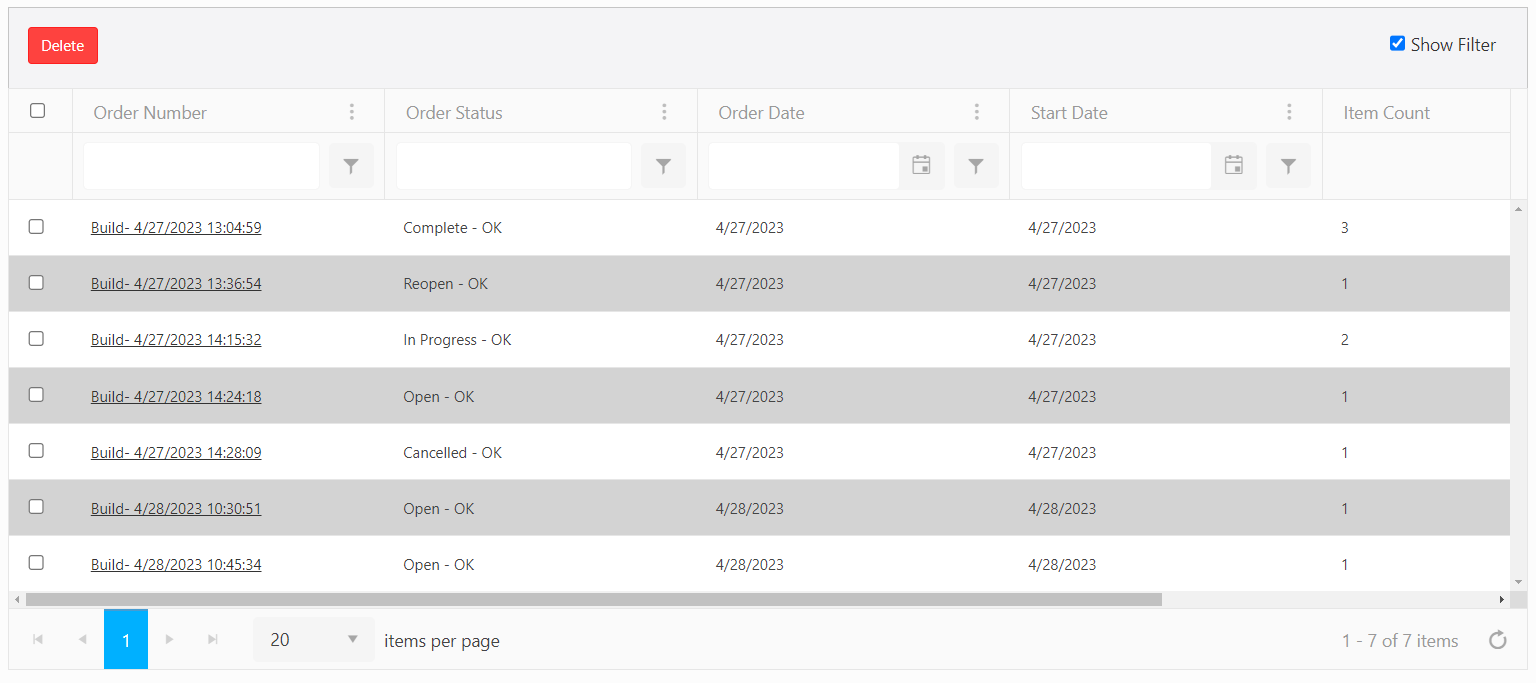
- Draft - OK - Note: The Draft status appears when you access the build order screen to create a new order. Once you save it. The status updates to “Open” on the Build screen and "Open-Ok" on the View Build Order screen.
- The View Build Order screen will no longer show the “Draft-Ok” status. It will only show the “Open-Ok” status.
- When you update and save old orders which are in “Draft” status, the status will change to “Open-Ok”.
